"No more speed, I'm almost there. Gotta keep cool now, gotta take care..."
Uh-oh.
Trouble in low-buck city.
I may have to break budget. Here's the dilemma:
Epoxy is gonna be the budget-slayer. I can buy a WEST kit (32 oz.) for as little as $67, but I need more than one quart. In fact, I figure I will need roughly THREE quarts of epoxy. So, I can spend 3 x $67, which will blow the low-buck budget. Or, I can step up to the gallon size epoxy, which will run me about $120. Ounce for ounce, it is cheaper, but when i include the cost of fiberglass tape and cloth, i am going to be waaaaaaayyyyy beyond budget. I am going to go to Aircraft Spruce tomorrow and see if I can scramble a deal; they are a great source for composite supplies, even if what you are building will never intentionally take to the air. I gotta be able to pull the rest of it together for $148.00
Hours 17 -18:
Down to the final little jobs to make the boat at least rowable. I decided to fancy up the relatively naked transom with some trim that ties into the gunwales. It gives the boat a little character and also stiffens up the top of the transom. I grabbed a couple of conveniently sized 1x4 offcuts, and traced the cutlines:

Cut, sand, clamp, glue, screw, tah-dah!
And used some more 1x4 scraps to gin up some oarlock cleats:

Next up, cut and fit the foredecking, and finally resolve the centerboard/leeboard decision.
Oh, and I think I have come to a resolution regarding the budget issue. Those of you who have followed this soap opera will remember an ealier episode, where I bemoaned the fact that I may go over budget. This was an issue of honour for me. I threw down the gauntlet to myself, and I'll be damned if I'll come up short. But, I didn't want to sacrifice quality (?!), durability or safety to come in under my admittedly arbitrary fiscal limit.
So, as I sit and ponder my dilemma, I re-read the crucial sentence from my first post on this project:
"The plan is to be able to get this bad boy built in under 25 hours total working time, on a $250 budget."
AHA! I found a loophole! I never specified which currency! I did NOT specify American dollars, Australian dollars, Canadian dollars, Bajan dollars...
If I figure my budget is $250 US dollars, and i have so far spent only $104.81 CANADIAN, then that means...
(Carry the one, multiply by pi, divide by ... screw it. Google.)
* If i had taken advantage of the economies of scale,and built two or more dinghies, and taken a little more time nesting the parts on the plywood I could definitely have brought the individual material cost of each dinghy under $250 cdn. So, I have rationalized my rationalization.
Right, back to it:
The following takes place between hours 19-21:
Pulled the trigger on the epoxy and glass supplies. I dropped a little more than 120 clams on FG cloth, FG tape, epoxy, fillers, spreaders pumps and chip brushes. Dropped another $6 at the dollar store on plastic pans and spatulas. Then, I set up a work space:

I spent more time than this project warranted on epoxy research, and in the end, chose West System. Why? It isn't the cheapest, (although on a project this size the difference between cheapest and most expensive was less than $50 ). It is not the most expensive. It IS, however, the best system, in my opinion. The pump system makes mixing resin and hardener damn near idiot-proof, the "by the numbers" resin/hardener/filler compatibility and selection really simplifies the process for both novices and pros, and their website has provided me with more information than every other epoxy manufacturers' websites combined. No exaggeration- spend a few minutes on the WEST system site, and you will begin to believe that epoxy can do damn near anything. In fact, I believe that WEST system epoxy may have killed Jimmy Hoffa.
Anyway...
So, now that I have a workspace kinda sorta almost organized, I start filleting. You may have noticed in an earlier installment of this series that the bottom of the hull was joined to the chines by zip ties- all of the zip-tied and screwed seams need to be fiberglassed to provide strength and watertightness. The only problem is that fiberglass doesn't like to be folded into sharp corners and angles. So, each seam has to be filleted- a mixture of epoxy and filler is slathered into each seam, and then tooled with to give a gentle radiused curve to each seam. I used high -tech tools to make nice neat fillets- a plastic spatula, a plastic spoon, a tongue depressor, and my finger. It's messy, and took me some time to start to get results that didn't look like it was squeezed out of an ex-lax addicted seagull. This is the end result:

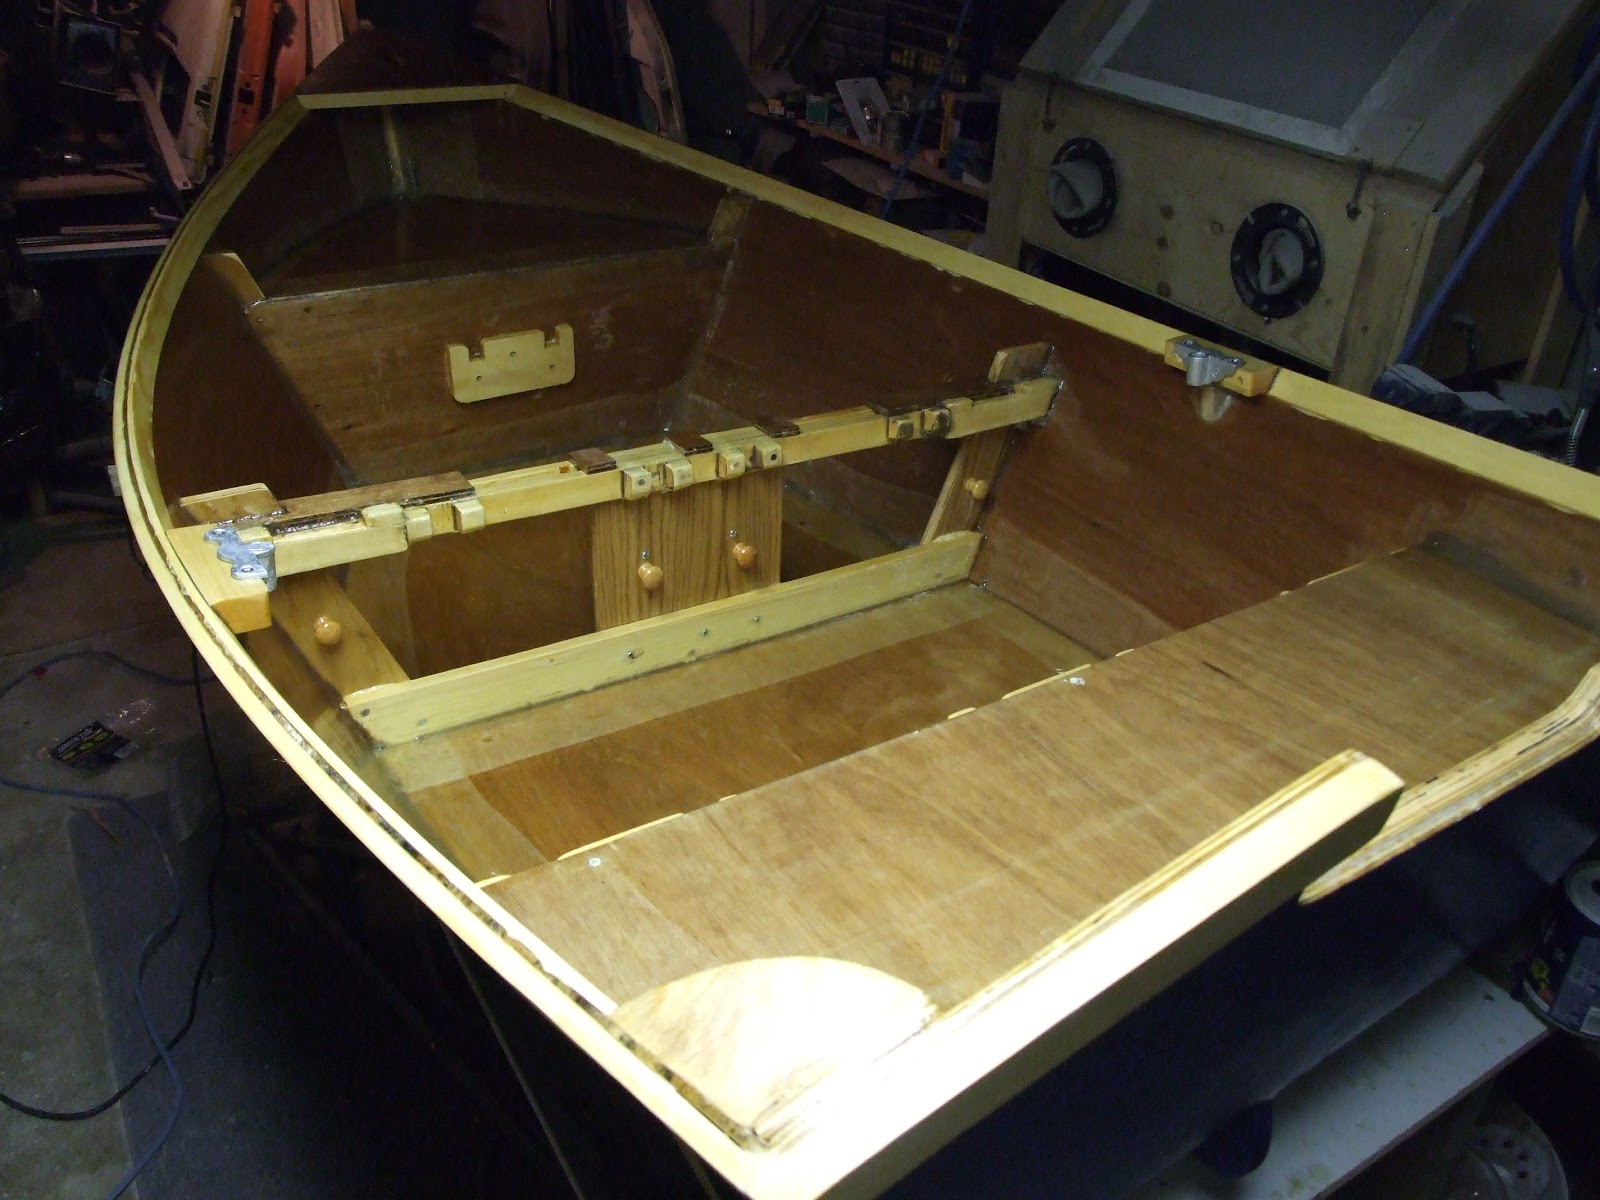
While I wait for the fillets to set up, I install the inwales. The inwales compliment the gunwales, and add a little more rigidity to the sheerline:


I had originally planned to work methodically- fillet the inner hull, tape the inner hull, epoxy the inner hull, then do the outer hull, but I discovered that a big roll of fiberglass cloth really complicates a small workspace. Sooner or later, either that roll of cloth was gonna get damaged, or I was gonna get damaged tripping over that roll of cloth, or both. So, I decided to work outside in, instead of inside out.
I flipped the hull...
I flipped the hull...

... removed the screws, filled the holes and any voids in the hull with thickened epoxy, then rolled out my cloth:

I cut off the excess, and mixed up some epoxy, and poured it on...

...and then worked like a tweaker with a free box of twinkies. I had a chip brush in one hand, a squeegee in the other, working the epoxy into the glass before it kicks. I'll need to throw on another couple of coats to completely fill the weave and level out the cloth before I paint.

Hours 22-24.... May 20/09- June 28/09
In addition to building dinghies, I actually have a real job that has had me working like crazy, and the pace shows no sign of letting up. The good news is that the money is stupid, but the bad news is that I have been, and will be, earning every penny- long hours and big headaches. Therefore, I have to work like an epileptic over-caffeinated orangutan on crack to get this dinghy in the water soon. So, here we go:
After another coat of epoxy to level out the hull, I flip the boat over. I have been retaining packing styrofoam from all of the consumer goods my household has purchased since I began this project, and proceed to cut and fit the various bits of foam to fit under the transom seat, then epoxy the seat into place, forming a (hopefully) watertight flotation compartment aft. I do the same thing ahead of the forward frame and now both ends are closed in. I tape and glass the sleat slats for rigidity...

... and then scratch my head to come up with a way of retaining them in the boat that will allow them to be easily repositioned. I settle on a system of small bungie cords attached to both ends of each slat, which loop over wooden IKEA knobs repurposed as cleats.

Tack another $10 onto the material bill for a jar of small cheap bungie cords. The budget is getting TIGHT... and so is the timeframe.
So, let's get to gettin'. I measure and precut all of the fiberglass tape for the seams, number them for clarity of assembly, pump some epoxy and start glassing the seams- thanks to precutting and numbering, I am able to get everything wetted and glassed in less than 30 minutes. The leftover epoxy gets slathered on the hull rather than wasted.
Once everything cures, I can sand, fair, and paint.... and this is where having the right tools comes in handy.
Then, i flip the hull...again.
I cut an offcut of luan to the height of the hull, and trowel on fairing epoxy then, using my new custom paddle that I bought at Aircraft Spruce, proceed to wipe most of it off the hull. the less there is on the hull the less i have to sand off. I quickly sand the hull down to something resembling smoothness ( providing the viewer is at least 20 feet away and is legally blind) and get ready for paint, and... crap! forgot to build a skeg!
Quickly rummage through the offcuts, find a likely candidate, cut, shape, screw, glass, fair...

...okay, NOW I can paint. add another $9 to the build tab for a quart of paint and....

Tah-dah!!!!!!!!
It even manages to escape from the basement without any home renovation required.

I bought the little 3.5 hp outboard for less than $120, and it seems like it will do an adequate job... I hope.
Now for the final tests- 1) can i get it to the marina in one piece, and 2) will it float?
Now for the final tests- 1) can i get it to the marina in one piece, and 2) will it float?

"Chirp" fit in the back of my VW van like a hand in a glove.
And, she floats like a dream, and tracks true on her painter, and looks right at home on the dock...

... and SWMBO thinks she rows great!

After making a couple of runs with the outboard attached, we decided to ditch the motor for two reasons- One, it was a recalcitrant two stroke that required an exceedingly long pull to start, and short boat + long pull = capsize. Two, it had no neutral, so once it DID start, you had better make damn sure you were pointing in the direction you wished to go. The plan for next season is to employ a trolling motor, with the battery stowed ahead of the thwart, which will also give Chirp some needed ballast. The upside is that she is light, making her easy to handle, and not much of a drag on speed when towed, and easy to row. the downside is she is light, making her a little tippy and subject to weight transfer.
Would I do it again? Yes. It was a fun build, I am pleased with the results, everyone who has seen her has complimented her, and now that I have the design and the bugs ironed out, I can get shave build time on the next one by about 20%...and if I build two or three at a time, the aggregate build time drops dramatically. Next project, though, is to build some davits for Whiskeyjack.
Just expressing a little Chirp love. We have told the girls there is no money for college. We've spent it all on epoxy...
ReplyDelete