What qualifies as a low-buck project?
1) Gotta be under $200 CDN, US, or equivalent currency.
2) You must have done it yourself. Although, if you found someone to work on your boat for less than $200, feel free to post contact info.
3) bonus points will be given for elegance and ingenuity.
My first foray was a cockpit table. I needed a cockpit table. Well, I, personally, didn't need a cockpit table, but SWMBO did, and I need a warm place to sleep, so you can see how the stars aligned on this one. I sussed out commercially available, marine priced cockpit tables and promptly gagged. So, I thought to myself, "Self, you could make it yourself for a lot less." One problem. Well, four actually.
1. I have limited woodworking skills,
2. limited woodworking tools,
3. and limited time. oh yeah, and
4. I am cheap.
So, I went to plan "c".
I spent some time eyeballing the cockpit in question:

Then I moseyed into action. I bought one of these for $29.99

A frenzy of measuring, remeasuring, cutting, screwing, drinking, varnishing, etc. later, and this is how it finished up:

As an added unplanned bonus, the table is reversible- install it aft of the wheel while Dockside for easy companionway access, mount it ahead of the binnacle while underway. When not in use, it simply stows under the salon table below.
I used up the rest of the table I sacrificed for the project that started this thread, and built a hinged double sided chartboard:

It's sized to fit standard charts folded in quarters. Course can be laid out on the clear cover with grease pencil. Next step is to build a pair of hinged stowable knees in the cabin of my boat to create a small-space nav station.
I needed duckboards, or a cockpit grate if you will, to replace the nasty looking deteriorated weird rubber mat that graced whiskeyjack's cockpit when I got her (see pics in first post of this thread). I priced having a teak grate custom built, my daughter burst into tears when I told her she was not going to be going to college, so then I decided to find an alternative. I bought two 8' cedar 2x6s and ripped them into 1 3/4 x 1/2" strips, measured and patterned my cockpit floor, started cutting and epoxying and gluing and screwing and varnishing and $32 later, this:

is now this:

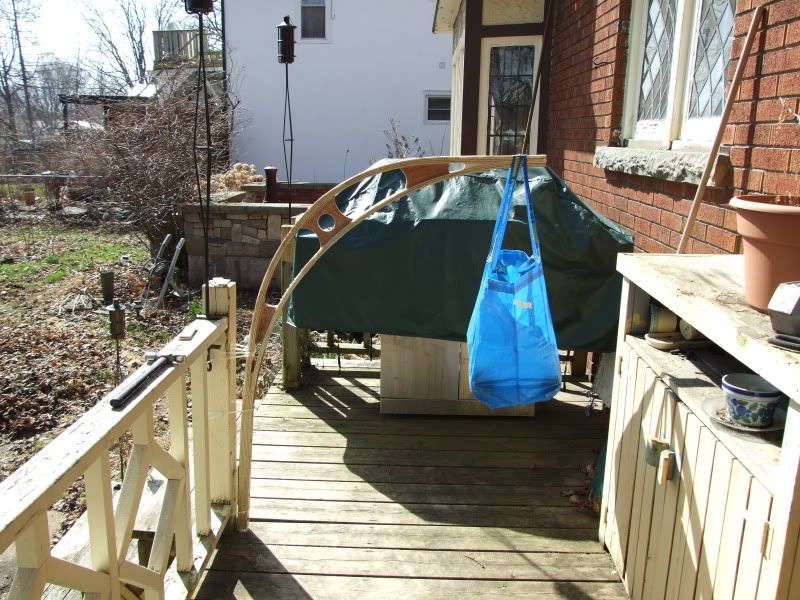
My low-buck dinghy needed a place to live. So I had to build some low-buck davits.

Updated:
Have you priced davits lately?
At the bottom end of the scale you have Plastimo davits, which start at $750, and it goes up from there. In keeping with my low-buck theme, i figured i would see if I could build an acceptable and attractive alternative, to carry the low-buck dinghy. The dinghy itself weighs less than 60 lbs., so here's the challenge I set:Build a pair of davits that would carry 75 lbs each, (for a combined total of 150 lbs) without failing, that would not embarass me when hung off the stern of Whiskeyjack (or her, for that matter,) and that cost less than $100.00.
Here we go.
First, I created an artist's rendition of how the davits should, and if all the stars lined up correctly, would look:
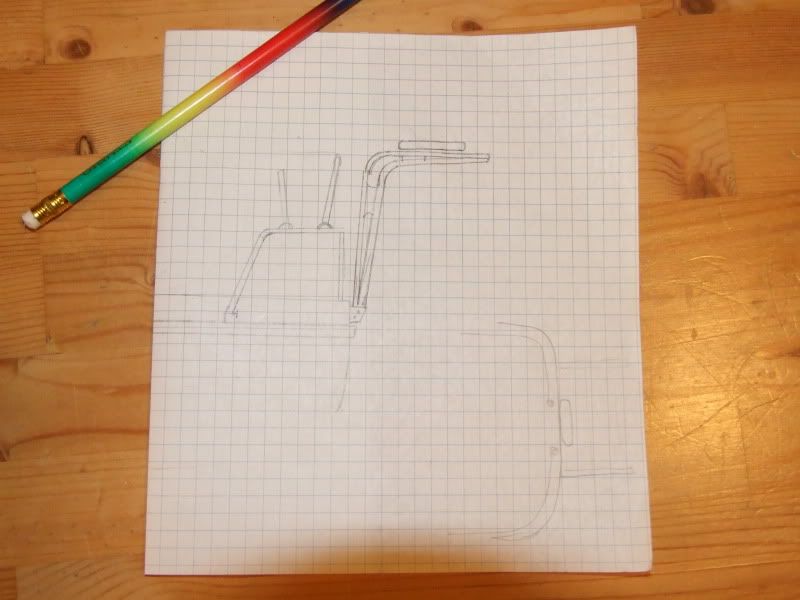
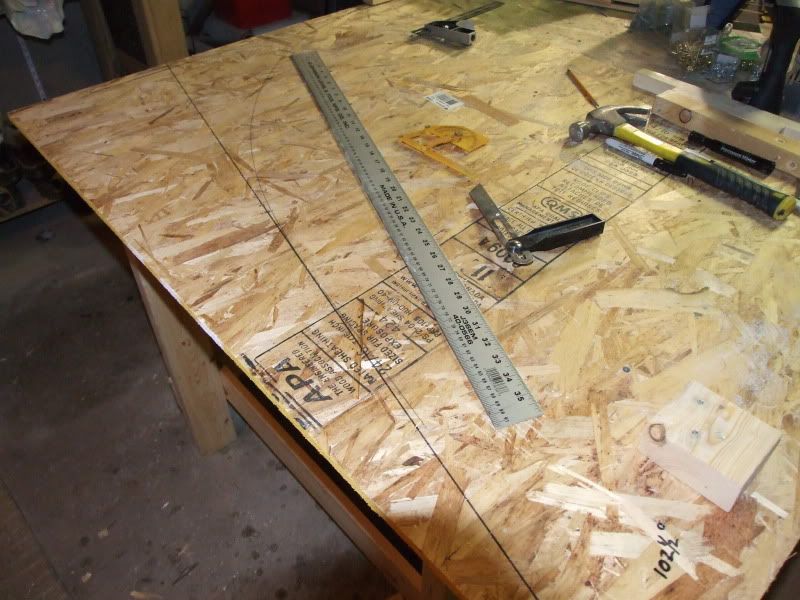
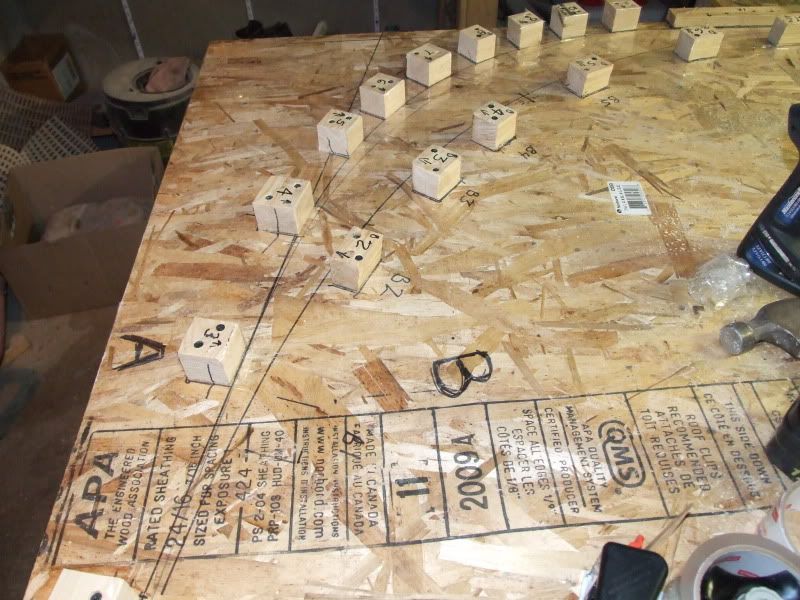
Then I carefully calculated the height and extension of the davits, as well as the angle of the dangle, then guessed at what looked like suitable dimensions. I laid out those dimensions on a layout table. this is where the davits will be born.
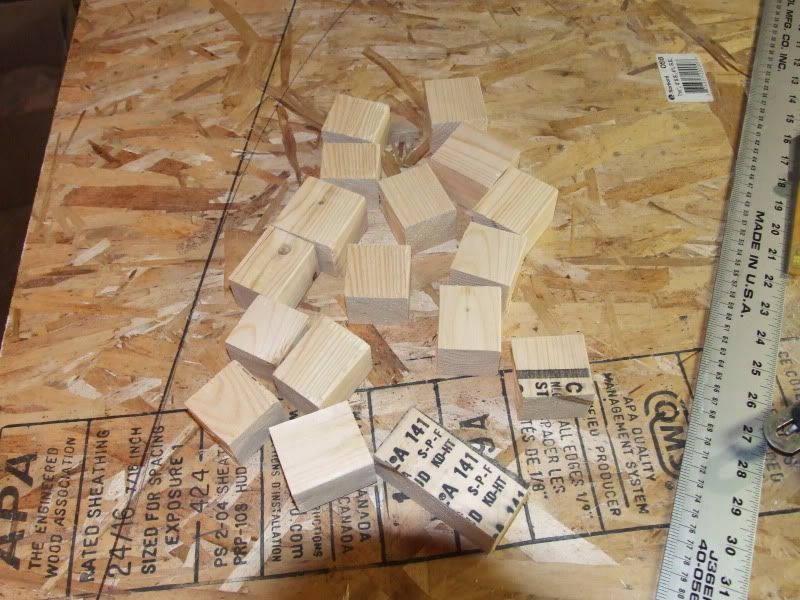
I cut a length of scrap 2x4s into even smaller scraps, then split those even smaller scraps into even more smaller scraps. These will become clamping cleats.
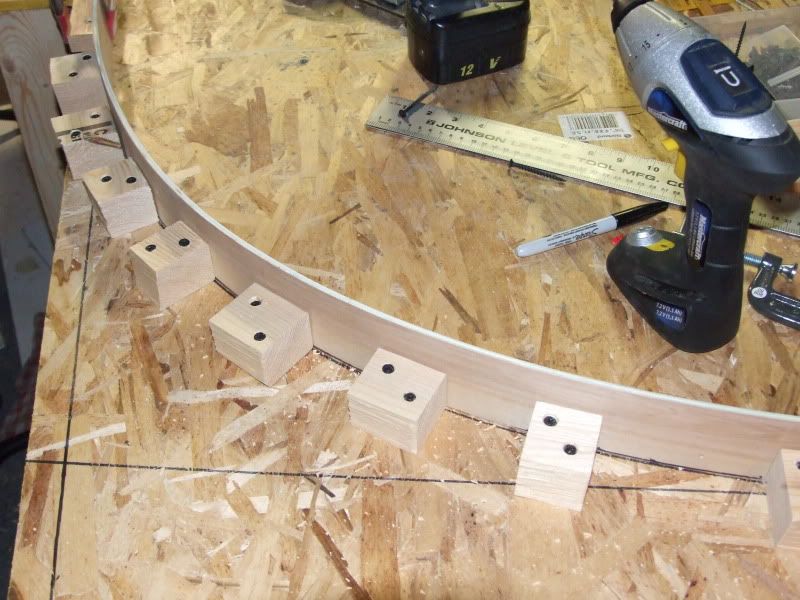
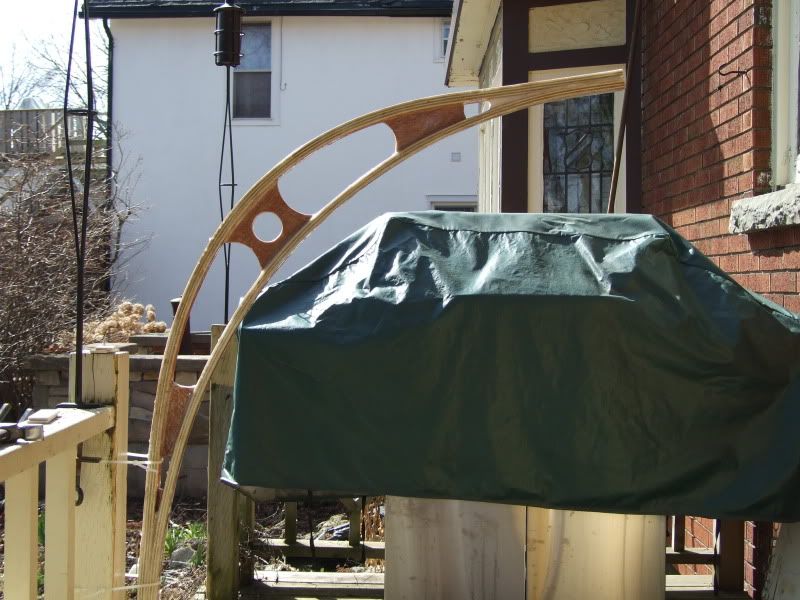
I then bent a batten of the construction material of choice, and traced the curves to establish where to secure the clamping cleats.
At which point I have unavoidably screwed up.
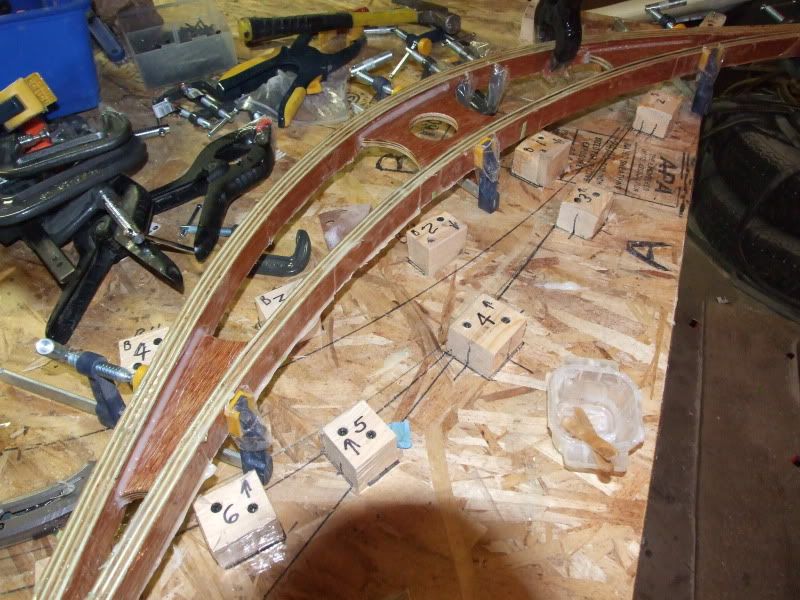
I am going to fab my davits out of my old friend, 1/4" mahogany ply and epoxy and fiberglass. For all intents and purposes, the ply is simply a support system for the epoxy and cloth. Each strip of ply will be buttered with thickened epoxy, and the entire laminate will be covered in fiberglass cloth... which will mean it will be permanently fastened to the layout table beneath it. They may very well end up being very attractive davits, but incredibly useless if permanently bonded to a table in my basement. so, I unfastened all of the cleats i had securely fastened to the table, after carefully labeling each one...
...and then I sealed the table and each cleat with a few layers of clear packing tape. Now, in theory, the davits will simply happily peel free of the table.
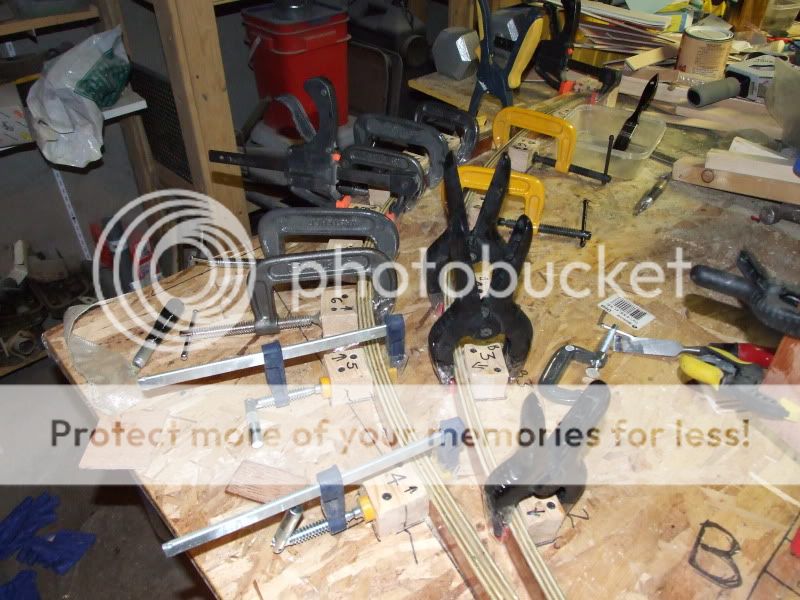
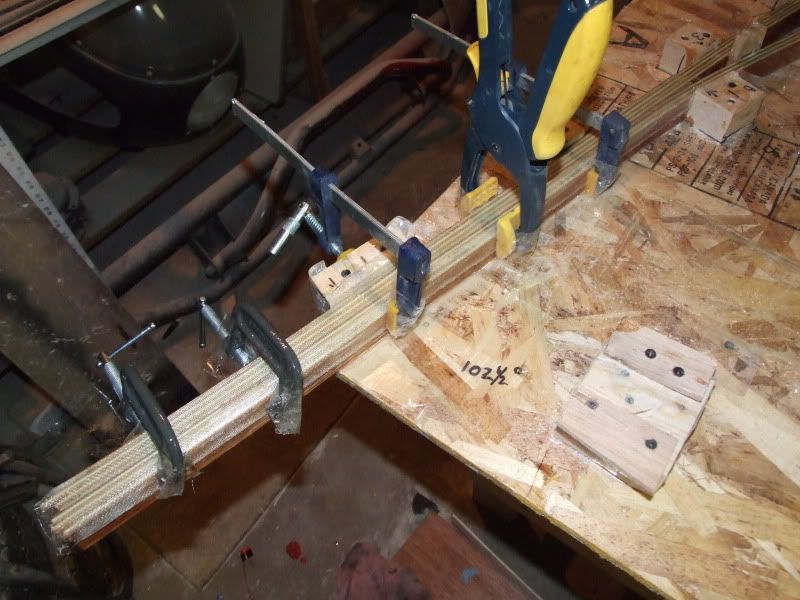
I then fired up my table saw, and ripped 20 1 1/2" strips from a 4/8' sheet. i planed them down so they were all more or less uniform in width, and dry laid the first davit. I trimmed the ends approximately to length, marked each strip for the assembly sequence, then buttered the exposed side with straight epoxy, and the mating surface with thickened epoxy, and got to clamping.
I decided to take advantage of some left over epoxy, and laid a layer of FG cloth wet on wet on the ends of the davit.
Davit one down. One more to go. Then I get to fab a mounting system.
Gussets cut and filleted into place.
Next step is to sheath the plywood with a layer or two of fiberglass cloth, which will add some stiffness and also help spread the load.
Speaking of loads...
Do you really think I am just flying by the seat of my pants, guessing at all this stuff? Do you honestly think that I am not smart enough or organized enough, to have run load and stress projections on the material before I started making sawdust? Honestly, do you really think I am a complete moron, simply crossing my fingers and hoping for the best?
If so, you are absolutely right, which is why I am only building one davit at a time.
Seriously, once I have this one glassed I am going to clamp it in it's installed position and start hanging weights from the end. I THINK, based on some admittedly basic calculations coupled with past experience, that I should be able to hang 75 lbs. without failure. That represents 1.5x the weight of the dinghy, or 3x the weight of the dinghy hanging on the pair of davits, which I THINK should be enough to tolerate some wave and wind stress. If nothing else, I will have a place to hang my solar panels, which is a secondary reason for this project. Yes, there will be two crossbars to tie the davits together and add some lateral stiffness, and provide aforementioned solar panel mounting.
I am going to use a couple of pieces of scrap stainless tube and some stanchion fittings to tie into the stern rail, and the foot of the davits will mount to the transom. I think I will have to fold some stainless sheet into a flanged Ushape for the transom mounts and then through bolt the davit to the plate and through bolt the plate to the transom with backing plates.
STRESS TEST RESULTS are in:
The weather was finally nice enough this week to see if my davits can carry the weight. (Actually,it took me a while to get up the guts to test my own WAG-style of engineering, but cold temps and rainy days make a good excuse.)
I carefully designed and skilfully constructed a cutting edge testing platform, then designed, cast and calibrated weight apparatus, and... I actually just tie-wrapped the davit to be tested to my back deck railing and hammered in a couple of wedges to keep it from moving around.
Here's the weight that the davit has to successfully carry:
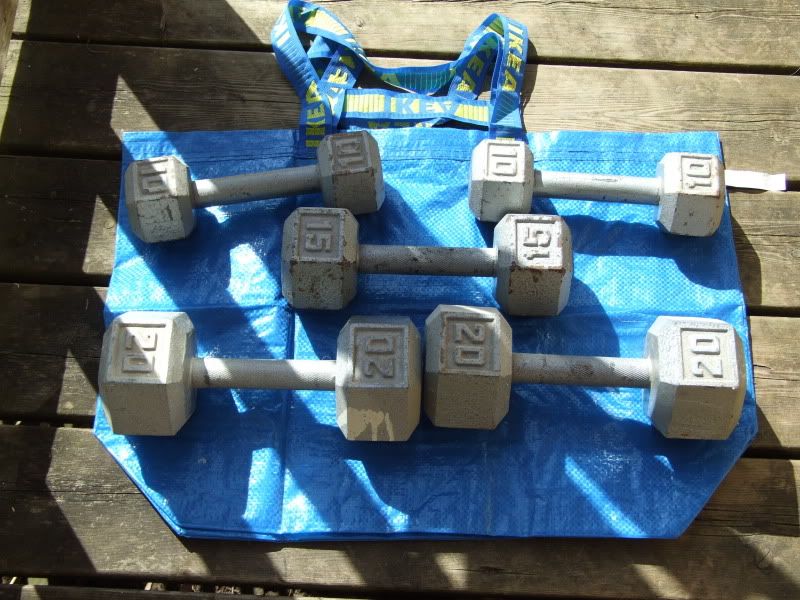
I decided to start light- here's 20 lbs:
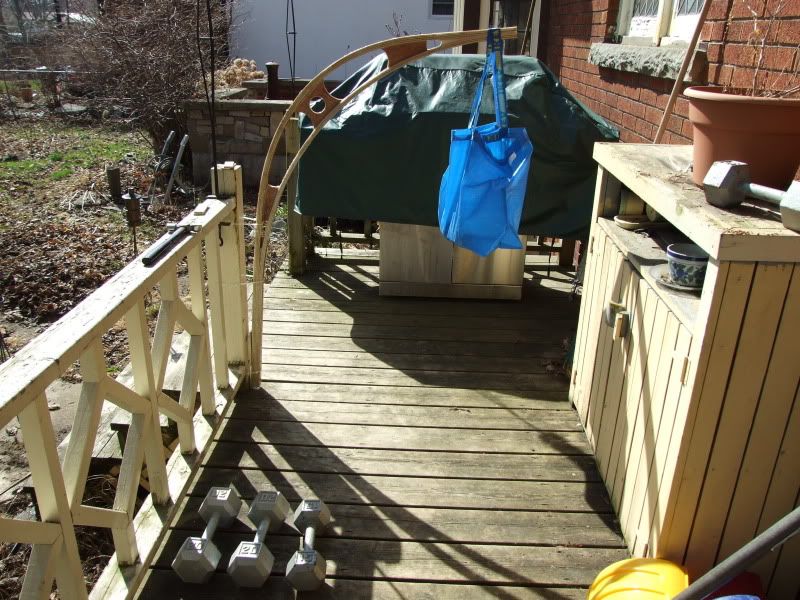
It didn't break, so I stuffed 35 lbs. in the bag. My high-tech mounting system was showing signs of stress so i threw some more tie-wraps at the problem, and no more creaking and stretching sounds.:
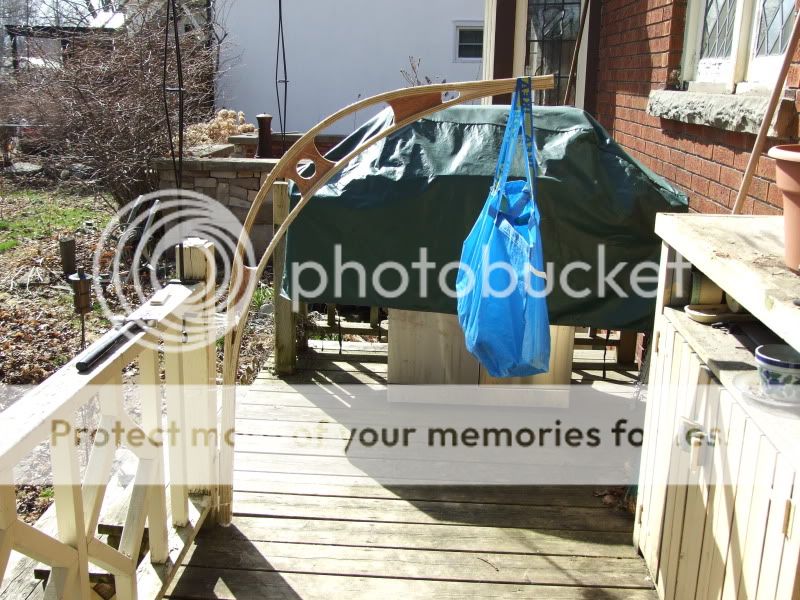
No problem. Next I shuffled the barbells around, and went to 60 lbs. Passed with flying colours. So, deep breath, here we go,
75 pounds....
YEAH, BABY!!!
I may add another layer of cloth to the top and bottom surface, just for peace of mind, but I am pleased with the result so far.
Currently I am working to finish up the mounting plates, and I will post pics shortly.
Updated update: Mounting plates installed:

I built a cockpit table for a friend's boat. $25 worth of mahogany and pine, $5 worth of epoxy and varnish:

$5.99 Sunbrella remnant.
Scrap of pvc pipe.
$5.55 of line.
Being able to sleep in past sunrise, and keeping the hatch open when it rains? priceless.
$5.55 of line.
Being able to sleep in past sunrise, and keeping the hatch open when it rains? priceless.

One issue on almost every small boat is no room for a garbage can. Another issue on "Whiskeyjack" is the amount of dead space below the galley countertop. Think, mark, cut, trim, screw together a couple of pieces of scrap luan for a lid, sand, varnish, Ta-freakin' DAH!


This winter, I focused on adding function to the interior of Whiskeyjack. There was a lot of wasted space under the v- berth:

So we decided to add a hanging cubby to the underside of the v-berth filler panel, which you can see just above the dog in the picture.

Hopefully the dog will still fit.
Update, April 28/11:
It fits, and looks like the dawg will, too.

In true low-buck fashion, this is a freebie project. One of the advantages of being a really lousy woodworker is that I always have lots of scrap wood lying around from earlier mistakes. Some of it is really nice wood, which I decided to put to use in a galley extension.
Our galley counter space is limited, and our room to add more counter space is limited as well, so I cobbled together a folding extension which will mount to the aft end of the galley, beside the sink in the picture below:

Here is the extension folded for storage:

(Please ignore the epoxy bubbles and runs- I still need to sand and add the final finish.)
And here, it's ready for use:

Hidden behind the flap when it is stowed is a narrow shelf, just big enough for nav tools, pencils, a pad of paper and issues of Good Old Boat and Small Craft Advisor.
Installed:


Most of the materials were scrap on-hand, but I did have to shell out $7.46 for hinges.
Also seen in the above picture is the knife rack, cut from 2 x2 cedar.
V-berth bookshelves:

Companionway doors:

Installed, with removable acrylic storm windows in place behind the screens.
