"Baby, get your shine on!"
Florida Georgia Line
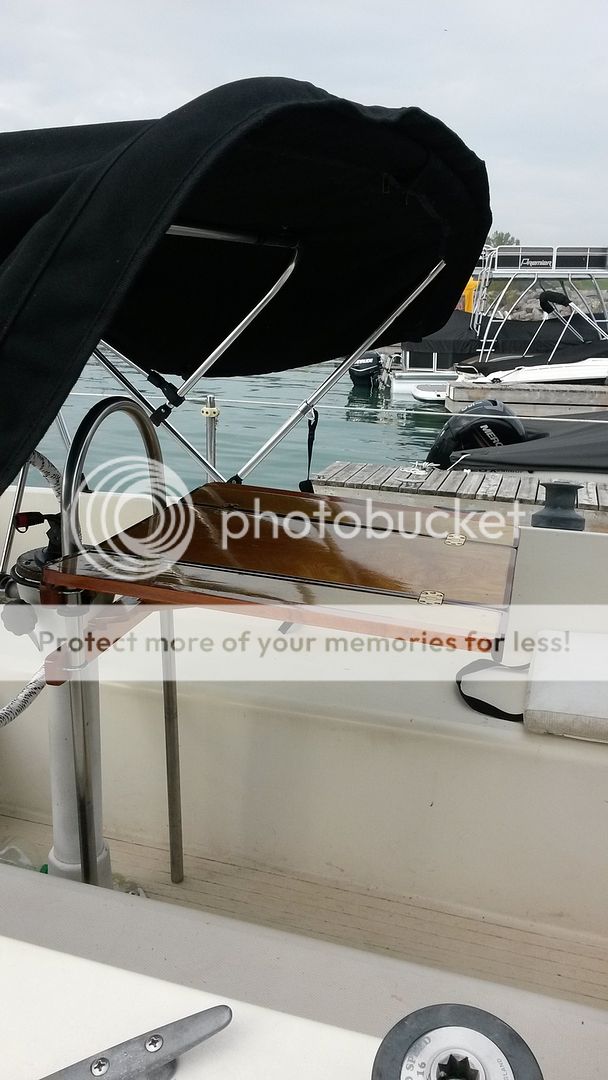
Nothing else is as durable, as protective, and as plain damn beautiful as varnish.
It's dead sexy.
But, sailors argue that varnish "doesn't hold up," "takes too long," "requires constant maintenance", and is "too much work"…..
….. as they buy another can of Cetol (or similar) to dull their brightwork.
Just like last year. And the year before that, and...
… and, has anyone noticed that Cetol (or similar)...
(let's call it That Other Stuff, or TOS, going forward)
...has change their formulation at least 3 times in the last decade to make their product more durable, more transparent, more like...
All of the complaints about varnish aren't really the fault of the coating, but rather the result of inadequate preparation, or an inadequate coating schedule.
In an effort to make the nautical world a , er, brighter place, I figured I'd bring varnish back, with some advice on how to get a durable, attractive finish that will last for years, even in Florida. The less time you have to spend on your brightwork, the more time you can spend sailing, sunning, or doing all of the other stuff on every boater's neverending punchlist.
Welcome to varnish school.
Sandpaper- 60- 220 grit. Pro-Tip: Don't cheap out on paper. I use Norton 3X. It lasts longer, and saves time with fewer paper swapouts. Buy it by the ream. You'll use it.
Sanding blocks, sanding boards, power sanders- use as appropriate.
Scrapers- I like a cabinet scraper with a handle, sometimes also known as a paint scraper. Get a variety , with a couple of different profiles. It never hurts to have 2 or 3 of each type, as they will dull through use. A good sharp scraper can remove material faster than a sander, with less loss of material.
Foam brushes- I find I get results that are just as presentable with a $1 foam brush as with $20 all-natural imported badger bristle brushes. When working in a boatyard, bugs, dew, and birds are likely going to be bigger dangers to the finish than brush quality. Using cheap brushes saves time and eliminates the risk of the finish getting contaminated because you improperly cleaned your brush after the previous coat.
Small low pile lint-free rollers- On large surfaces- as wide as the roller or more- I like rolling and tipping , just like with paint. Which makes sense when one realizes that varnish is, as someone once said, just paint without colour.
Disposable nitrile gloves.
The keys to a durable finish are preparation and penetration. Each finish coat has to bond to the previous coat, which has to be firmly bonded to the surface being coated. At the risk of being all new-agey metaphorical, think of a varnish job like growing a tree- it needs to be able to plant roots, and then grow, one layer at a time.
So, continuing the metaphor, you need to prepare the soil for planting.
Step 1. The first step is to ensure that the surface is entirely naked- free of paint, old varnish, old caulk, et cetera. Any place where an old finish remains is a place where a new finish can't take root.
I like using a cabinet scraper to get the worst off, then sanding with 60/80/120/150 grit until the wood is bare. If you use a chemical stripper, makes sure you wash the surface thoroughly to remove any trace of stripper prior to sanding.
Step 2. Sand the bare wood with 180 grit sandpaper to prepare the surface for the first coat.
Step 3. Clean the surface to be varnished. I use methyl hydrate (alcohol) on a lint free rag, or paper towel- . It picks up dust well and evaporates quickly, leaving nothing behind to contaminate the finish coats.
Step 4. Prepare your finish-Open your can of varnish, and mix the varnish by STIRRING, not shaking. Thin your varnish of choice , with the appropriate thinner, to a ration of about 1:10- 1 part varnish to 10 parts thinner. Yeah, it's 90% thinner, for a reason- you want the first coat to penetrate DEEP into the wood. The advantage of a thin coat is that it cures relatively quickly, allowing you to apply multiple coats per day.
Obviously, you're not working straight from the can. I like to decant the varnish into a plastic sour cream or yogurt container with a lid before thinning. Apply with a foam brush, or a low pile lint-free roller on larger surfaces. I like to let the brush "rest" in the cup for a couple of minutes while I wipe down the wood to be finished. When applying, work in one direction, with the grain, from end to end, always working from the wet surface to dry. Don't flap your brush back and forth- work in one direction only. Don't overload the brush or roller! This is a thin coat- a little goes a long way, and any more than a little will run and drip and waste material. Don't panic about bubbles. They will flow out within seconds.
When finished, put the lid on your varnish cup, and throw your roller or brush away. Clean your roller tray if you used one.
When Coat #1 is dry the touch, move on to the next step.
Step 5. Apply coat #2- Thin your varnish of choice, with the appropriate thinner, to a ratio of about 1:5 – 20% varnish, 80% thinner. Chances are, you have some left in your yogurt container- just add some more varnish and stir. All of the ratios are approximate, so being a little over or under is not the end of the world on these early penetration coats. Apply the same way you did coat #1.
Step 6. Sand. Using a sanding block, sanding board, or power sander, sand the surface with 220 grit. Time-saving Pro Tip: Load your sander of choice with multiple sheets of paper. As a sheet loses its grit, tear it off and keep going.
Step 7. Clean the surface with alcohol.
Step 8. Apply Coat #3 thinned about 1:1 – 50% varnish, 50% thinner. Apply as previous coats.
Step 9. When Coat #3 is dry to the touch, apply Coat #4, thinned 1:1. Apply as previous coats.
Step 10. Now you are starting to see some shine, and probably some runs and drips as well. Sand with 220 grit, to knock off the gloss and give some tooth to the surface. Sand out any runs and drips, but be careful not to get carried away and sand off an entire coat!
Step 11. Clean the surface with alcohol.
Step 12. Apply Coat # 5, thinned about 3:1 - 75% varnish, 25% thinner. Apply as previous coats.
Step 13. When Coat #5 is dry to the touch, apply Coat #6, thinned 3:1. Apply as previous coats.
Step 14. You will start seeing some real depth to the finish, and some impressive shine. You will admire your reflection in the surface, and take pictures to show your friends on facebook. Bystanders will compliment your work. You will think "it's good enough.' You will want to be done.
Sand, just like in Steps 6 and 10.
Step 15. Clean the surface, one last time, with alcohol.
Step 16: Apply Coat #7, thinned 9:1- Yep, you guessed it, 90% varnish, 10% thinner. Apply sparingly and slowly- a little goes a long way.
Step 17: When Coat #7 is dry to the touch, LIGHTLY scuff the surface with 220 grit sandpaper or higher. If I am feeling finicky, and working with a surface where a mirror gloss finish is desired, like a table top, I will wet sand with 400 grit paper. For most exterior marine wood, like coamings, rubrails, toerails, etc, 220 grit is more than sufficient. Any minor swirls and scuffs will go unnoticed as new scuffs and swirls are added during regular use.
Step 18: One last time, clean the surface with alcohol.
Step 19: At last! Finally, apply Coat #8, thinned 95:5- 95% varnish, 5% thinner.....
Step 20: ….Unless you sail where the butter melts in January. Then, when Coat #8 is dry to the touch, add a Tropical Coat #9, thinned as Coat #8.
"Great mother of Neptune!" Skeptical Reader thinks to him/herself, (but not out loud, because you are a Polite, as well as Skeptical, Reader), "That's a crap-ton of work! All that sanding and thinning and brushing and sanding and cleaning and thinning and, I thought you said this was going to take less time!"
Once you have the surface prepped, all the old crud off and ready for refinishing, you can apply two coats of varnish per day- one in the late morning after the dew is off, and one in the late afternoon. So, figure four days to apply 8 coats.
But, once you have put in those four days, applied those 8 coats, sanded and prepped and brushed and sanded and cleaned , repeat, repeat , repeat... the hard work is done for YEARS.
Every three years or so, scuff the surface and apply a maintenance coat, thinned 5%, just like Coat #8.
If any nicks, scratches, dings, dents, gouges or chunks occur (and we all know they will) scuff and recoat ASAP. The key to a lasting finish is to make sure the wood is not exposed for any length of time.
Yes, Skeptical Reader? How is this less time –consuming than applying That Other Stuff, you ask?
Let's do the math: if you only plan to keep your boat for a single year, there is no time savings- applying a knee-weakeningly gorgeous varnish finish is more labour intensive than smearing the recommended three coats of TOS all over your teak and mahogany and oak.
But, applying those three coats will require 3 days, minimum- you can't "hot-coat" TOS- it needs to dry for 24 hours between coats.
So initial application is 3 days of time, plus initial prep, PLUS, you need to sand between coats.
In year two, the surface will have to be sanded and another coat of TOS will need to be applied.
In year three, sand and apply another new coat.
In year four, sand and apply another new coat .
In year five, sand and apply another new coat.
In year six, sand and apply another new coat.
So over 6 years of ownership, at least 8 coats of Cetol have been applied, and the finish sanded after each coat- in other words, 8 times.
Compare to varnish:
Sanding 5 times during the initial application schedule, and NOTHING until a scuff sanding and maintenance coat every 3 years. Over 6 years, you have only had to sand the brightwork and apply a maintenance coat twice. Sanding and cleaning always takes more time than applying finish, so the less sanding and cleaning you have to do, the more time you have to do something else.
And we all know there is always something else to do.
Thanks for dropping by- Please, feel free to "Talk the Dock!"


