"You want paradise..."
-Foreigner
First, a little personal history:
A decade ago, in the era PB (Pre-Boat), SWMBO and I (okay, mostly SWMBO) decided that we needed to replace the shed in the backyard of Stately Jones Manor. The shed was...
... less than stately.
Hell, it was less than intact and decidedly unsafe. Although uitilized as shelter for our underused and oft-neglected lawn and garden equipment, that equipment was now doing double duty holding up the shedding shed.
Clearly, we had to do something.
We knew we didn't want an aluminum panel -and-channel nuts-and-bolts utilitarian box. We wanted a stately wood shed that would be an attractive addition to our backyard, not just a holds-our-crap blight. We also knew we didn't have the ambition or the skill set to build a shed from scratch, and didn't have the ready cash to buy a pre-fabricated shed, or hire a crew to build one for us.
So, we procrastinated and pondered, as the existing shed grew ever less square and vertical and closer to the ground.
Perusing the sale flyers in our local free throw-away newspaper, we discovered a local lumberyard had attractive affordable, stick-built shed kits available.
A shed KIT! Perfect!
I built model kits as a kid, I had assembled damn near a houseful of IKEA furniture, I could definitely build a shed from a kit!
We went to the yard, picked a design we liked from their catalogue, and were assured that our shed kit would be delivered in time for the weekend.
Perfect! We can have this thing assembled before Monday!
Friday, as promised, a truck from the lumberyard pulls up, and deposits our shed kit in the driveway of SJM.
The "kit" consisted of a big pile of lumber, three bundles of shingles,a bag of nails and screws and hardware, a door, and 2 pages of poorly photocopied plans.
"Kit", my ass.
We got it done, and it still does it's job ten years on, but it took a lot longer than a weekend, and it took more manpower than SWMBO and I.
This project taught us some skills, and taught us that we could do it
Ever since, however, I have been dubious of the ease of assembly of any DIY "kit."
Flash forward to the summer of 2015:
Karma, like Whiskeyjack before her, has an icebox. For 8 seasons, we schlepped bins and blocks of ice down the Dock, and dealt with the daily ritual of emptying catchbottles of meltwater. Iceboxes are simple systems, and do a more than adequate job of keeping food and beverages cold. It was a good system on Whiskeyjack that gave us no reason to complain.
On Karma?
Not so much.
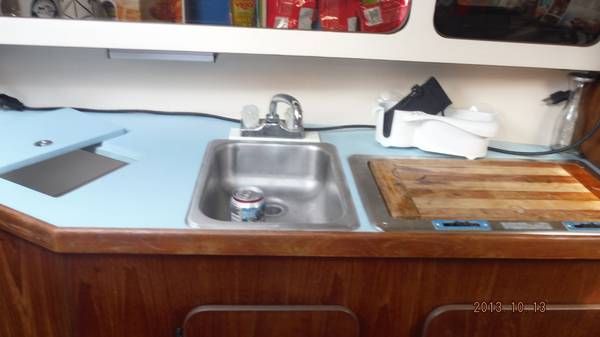
First, Karma's icebox is oddly, trapezoidally, shaped.
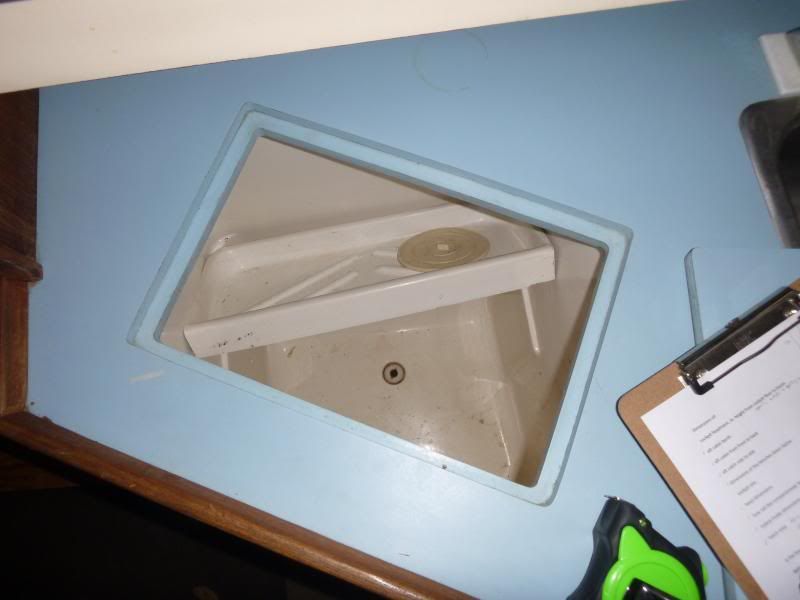
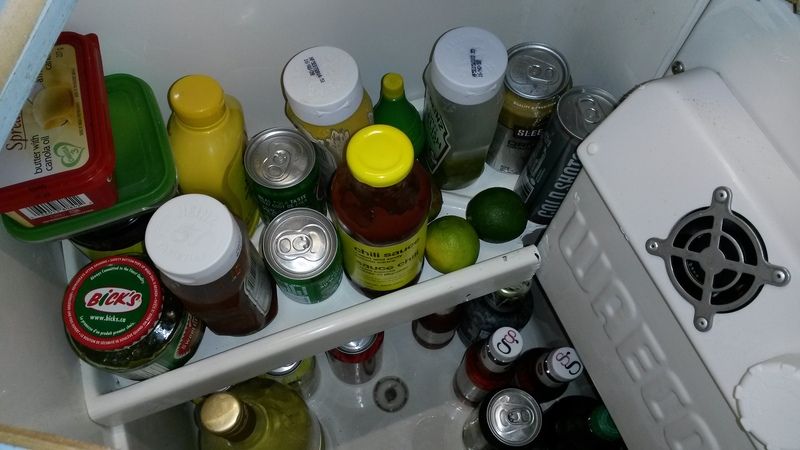
This meant that the bins that we used to hold iceblocks and contain meltwater on Whiskeyjack didn't fit. Not an insurmountable issue, it simply means that ice blocks have to be loaded into the icebox naked, and rather than meltwater being caught in a bin, is allowed to drain from the icebox...
.... into the (shallow) bilge. Not ideal.
At the beginning of this season, i redirected the drain into a catchbottle, which required emptying daily. Again, not an insurmountable issue, but one more daily chore, albeit not onerous... unless you're away from the boat for more than a day in which case the catchbottle no longer catches and overflows onto the carpeted sole.
Again, not ideal.
Lastly, the shape of the icebox limited iceblock placement, which in turn limited food and beverage capacity.
Yet again, not ideal.
So, refrigeration became a topic of discussion. Said discussion boiled down to:
Will it fit?
Will it work?
Can we afford it?
Will it fit? Good question. An S2 8.0C is a roomy boat with lots of storage, but just as the icebox is weirdly shaped , so are many of the lockers and bins. Lots of research and measuring told me that installing a typical refrigeration system's compressor and condensor and stuff wasn't going to be simple or easy. Measuring inside the icebox, and comparing cold plate sizes online, our options were limited.
Will it work? Good question. Regular Readers know that we are off the grid on the Dock- no water, no shorepower. Our electrical needs are supplied by our solar panels- so, anything electrical that we add to our boathome has to work within the restrictions of the available battery and charging capacity.
Can we afford it? Good question. Tallying the costs, we were looking at an expenditure of anywhere from $1200 to $2200. Ouch. This would be our first four-figure boat project in, like, ever.
So, after pondering, we realized that we didn't think it would fit, weren't sure if it would work, and didn't figure we could afford it.
Then I discovered the Dometic/Waeco/Adler-Barbour Coolmatic Cooling Conversion Kit.
Note that last word.
It's dreaded kit status notwithstanding, it seemed to tick all of our boxes-
Dimensionally, it fit- instead of being a internal evaporator/external compressor/condenser set up, the Coolmatic is an all-in-one unit measuring about 10" x 12". Cut a hole in the side of the icebox, screw the unit in place, run some wires, done.
That "about" becomes important later.
It wasn't too taxing for our electrical system either- the advertised draw was 4 amps, with a 20-30% duty cycle. In theory, that means it draws less than 1.5 amps per hour, and this would be the largest constant draw on the boat- our lighting is all LED, and the only other energy use is charging electronics. so our 120 watts of solar delivering an average of 60 amps/day should keep us ahead of the charging curve.
It's not a cheap system, but at $799 (on sale), even with tax it didn't break the psychological 4 figure barrier.
So, we pulled the trigger, and ordered one up from our friends at Binnacle.com .
4 days later, a day earlier than promised, a box showed up.
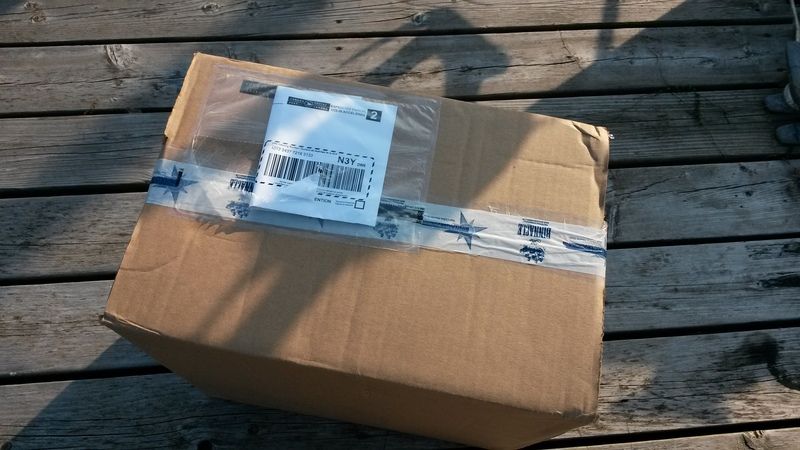
Once unwrapped, our kit is revealed;
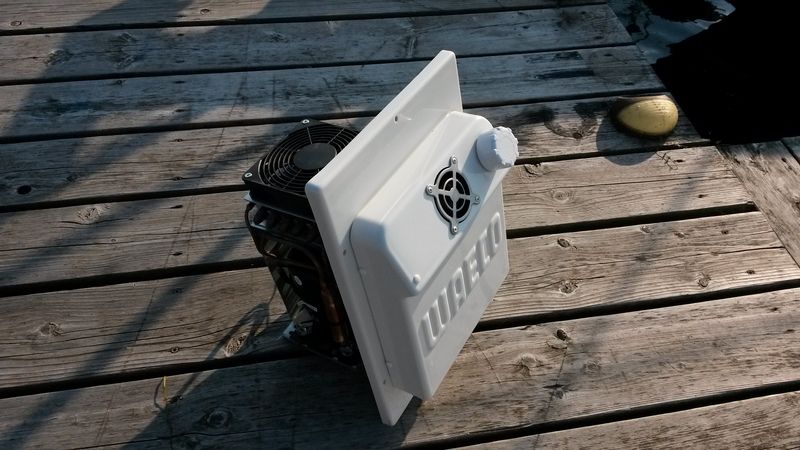
Okay, looks pretty much plug-and-play.
Here's the plan:
1. Measure and mark the cutout in the side of the icebox.
2. Drill pilot hole.
3. Cut out panel with jigsaw
4. fit cooling unit into hole.
5. Screw into place.
6. Wire into distribution panel.
7. Enjoy cold beverage.
I figured it would be an hour's work, tops.
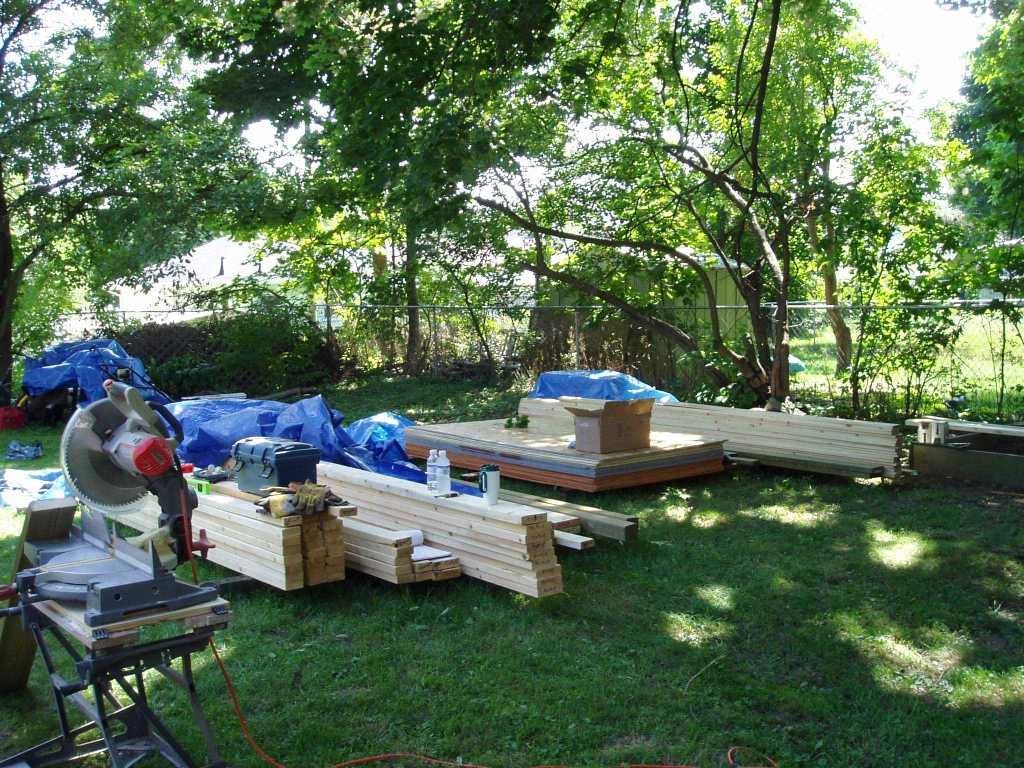
SWMBO and I emptied the icebox of contents, transferring said contents to a cooler brought aboard expressly for this purpose, and I embarked on step 1.
Jones's 4th Law of Boatwork- no plan ever survives past step 1 unchanged.
My initial plan, based on the measurements I had taken before buying this kit, and the measurements quoted in all of the manufacturer's literature, was to install the unit on the aft side of the icebox. Now, with my new Coolmatic in hand, I discover that the aft wall of the icebox was 1/4" too narrow.
Well, shit.
Okay, so I need to mount it on the forward side of the icebox, and hopefully it will clear the sink and still have decent ventilation around the fan and cooling fins.
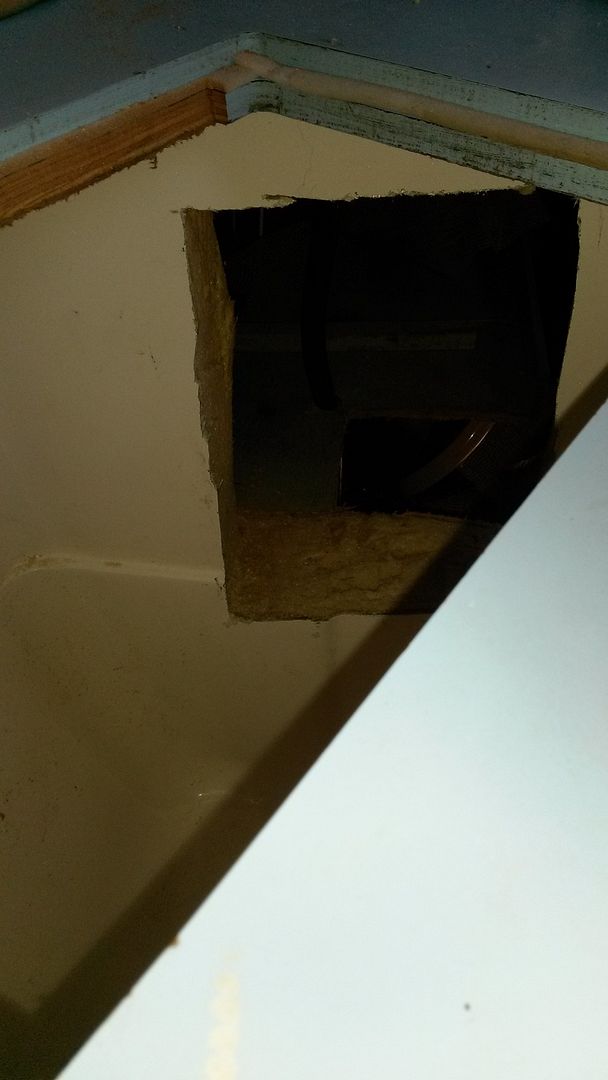
So, I careful trace the cut-out, according to the template included in the installation instructions, drill my pilot hole, and discover that the forward wall of the icebox is 4" thick...and my drill bit is 3 1/2" long.
Well, double shit.
Did I mention that I decided to jump into this endeavour during the hottest week of the summer?
At this point I am 2 hours in and soaked in sweat. Time to call it a day.
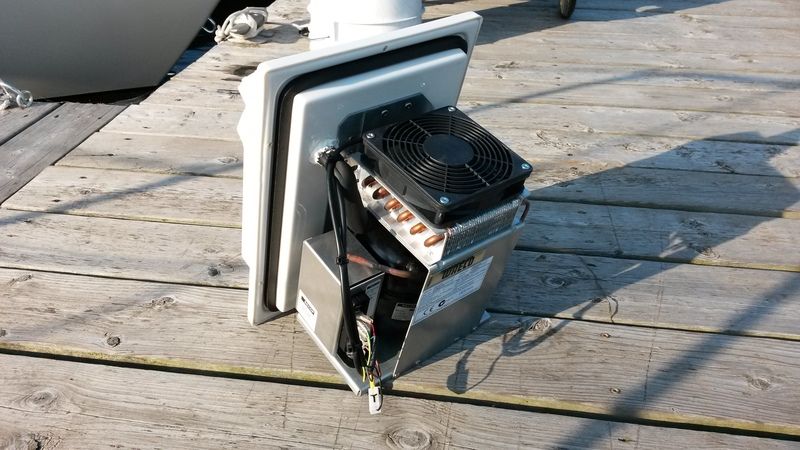
Day 2, I cut out the inner wall of the icebox, gouge out all of the insulation ( this icebox has about 3" of insulation), then get out the sawzall and carve out a hole in the panel between the icebox and the sink cabinet.
I gently slide the Coolmatic into the icebox...
... and it doesn't fit through the icebox opening.
SHIIIITTTTTT!!!!!!!!!!
Okay, new Step 4(a)- out comes the jigsaw, the ice box opening is enlarged (which means the icebox lid will no longer fit. Son of a ....)
Now the Coolmatic will slide into the icebox...
.... but not slide into the freshly cut hole.
I am beyond profanity at this point.
So, Step 4(b)- test fit, retrim, test fit, re-trim, test fit, retrim, testfit, retrim, testfit retrim, testfitretrimtestfitretrimtestfitretrimtestfit... it FINALLY fits.
I am now 6 hours total into this job, in 90 degree heat. Look up "masochist" in the dictionary- See that picture? That's not me, that's some other poor sap, because I was still installing a FUCKING REFRIGERATION "KIT"!!!
Once the "kit" was installed, the rest was relatively straightforward- screw the reefer unit into place, seal it up with some caulking, trim the icebox shelf to fit and reinstall, clean everything up (again), wire it up, and put everything that came out of the icebox back into the icebox...
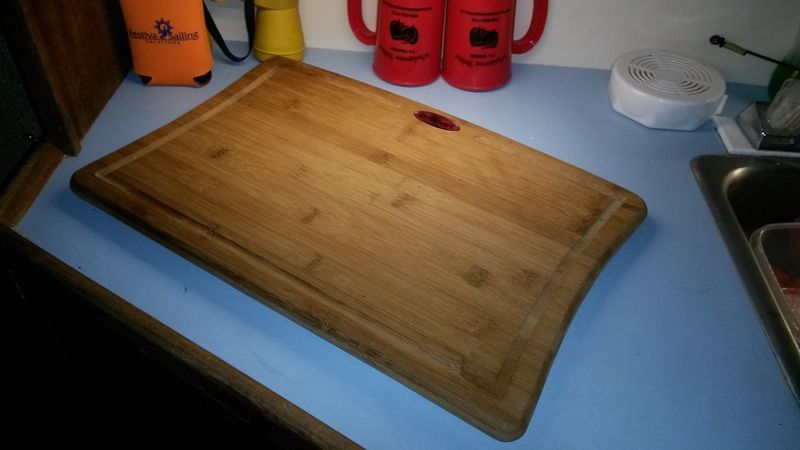
...Then build a new icebox lid. I repurposed a cutting board, added some styrofoam insulation to the underside and some foam weatherstripping, and called it done.
From start to finish, I had 9 hours into the job, over 3 days.
(To be fair, Dockneighbour Frank bought the same unit after seeing ours, and he DID get his installed on his O'day in under an hour. Having a uniform sized icebox with a big lid and easy access makes a ton of timesaving difference.)
But, the end result is worth it.
This unit is quiet. It is quieter than the fridge in our kitchen at SJM. Power consumption seems to be in line with specs. In the spring I will rework the lid/opening flange to get a better seal, and add some more foam board to the lid for better insulation. The contents of our reefer (can't call it an icebox any more) are kept acceptably cool, with the dial set to 4, but adding a little insulation and improving the seal can't hurt.
I'd do it again. we now have more room in our chillybox, no more lugging ice, and no catchbottles to drain daily.
The economics are subjective, and a bit of a toss-up. In the short term, it doesn't make sense, from a cost-savings standpoint. A block of ice would last three days in our icebox on average, and if there were serious perishables onboard, we would load in two blocks at a time. At $3/block, call it $150/season. Over 10 years, however, assuming the cost of ice doesn't rise or drop, that's $1500 that we don't have to spend on ice, by spending $800 (plus tax) on a refrigeration "kit" So, long-term, it makes sense.
It also means that, while our current electrical system is keeping up, I am now considering adding a second house battery and another solar panel, just in case.
But, that's another project, for another day.
Merry Christmas, everyone.