Friday, 3 March 2017

Shine On- A Brightwork Tutorial


     "Baby, get your shine on!"
             Florida Georgia Line


Varnish just works. 
Nothing else is as durable, as protective, and as plain damn beautiful as varnish. 


  It's dead sexy.


It's that simple. 


Butsailors  argue that varnish "doesn't hold up,"  "takes too long,"  "requires constant maintenance",  and is "too much work"….. 
.. as they buy another can of Cetol (or similar) to  dull their brightwork.  
 Again. 
 Just like last year.  And the year before that, and... 
  and, has anyone noticed that Cetol (or similar)...
  (let's call it That Other Stuff, or TOS, going forward
...has change their formulation at least 3 times in the last decade to make their product more durable,  more transparent, more like... 


 varnish? 

All of the complaints about varnish aren't really the fault of the coating, but rather the result of inadequate preparation, or an inadequate coating schedule. 

In an effort to make the nautical world a , er, brighter place, I figured I'd bring varnish back, with some advice on how to get a durable, attractive finish that will last for years, even in Florida.  The less time you have to spend on your brightwork, the more time you can spend sailing, sunning, or doing all of the other stuff on every boater's neverending punchlist. 
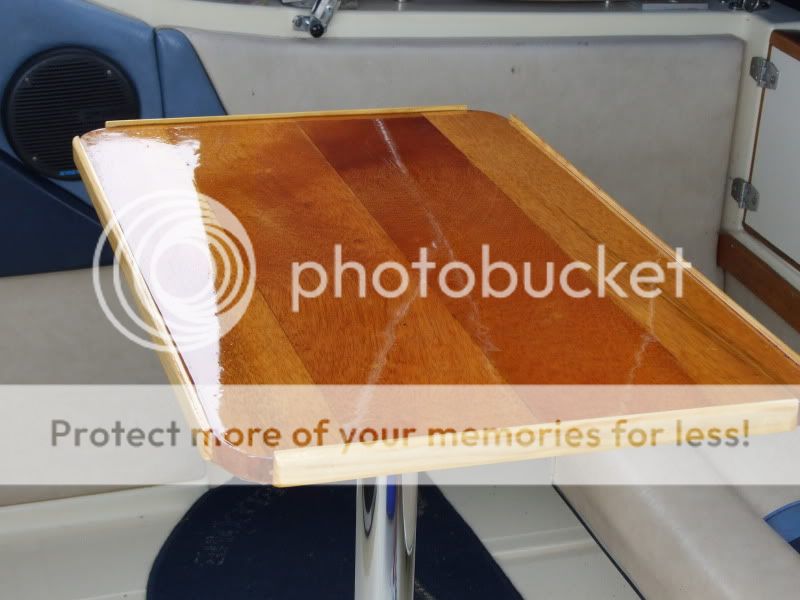

   
Welcome to varnish school. 


You're going to need... 

Sandpaper60- 220 grit.  Pro-Tip:  Don't cheap out on paper.  I use Norton 3X.  It lasts longer, and saves time with fewer paper swapouts.  Buy it by the ream.  You'll use it. 
Sanding blocks, sanding boards, power sanders- use as appropriate. 
Scrapers- I like a cabinet scraper with a handle, sometimes also known as a paint scraper.   Get a variety , with a couple of different profiles.   It never hurts to have 2 or 3 of each type, as they will dull through use.  A good sharp scraper can remove material faster than a sander, with less loss of material. 
Foam brushes-  I find I get results that are just as presentable with a $1 foam brush as with $20 all-natural imported badger bristle brushes.  When working in a boatyard, bugs, dew, and birds are likely going to be bigger dangers to the finish than brush quality.  Using cheap brushes saves time and eliminates the risk of the finish getting contaminated because you improperly cleaned your brush after the previous coat. 
Small low pile lint-free rollers-  On large surfaces- as wide as the roller or more- I like rolling and tipping , just like with paint.  Which makes sense when one realizes that varnish is, as someone once said, just paint without colour. 
Rags, paper towels, etc. 
Disposable nitrile gloves. 
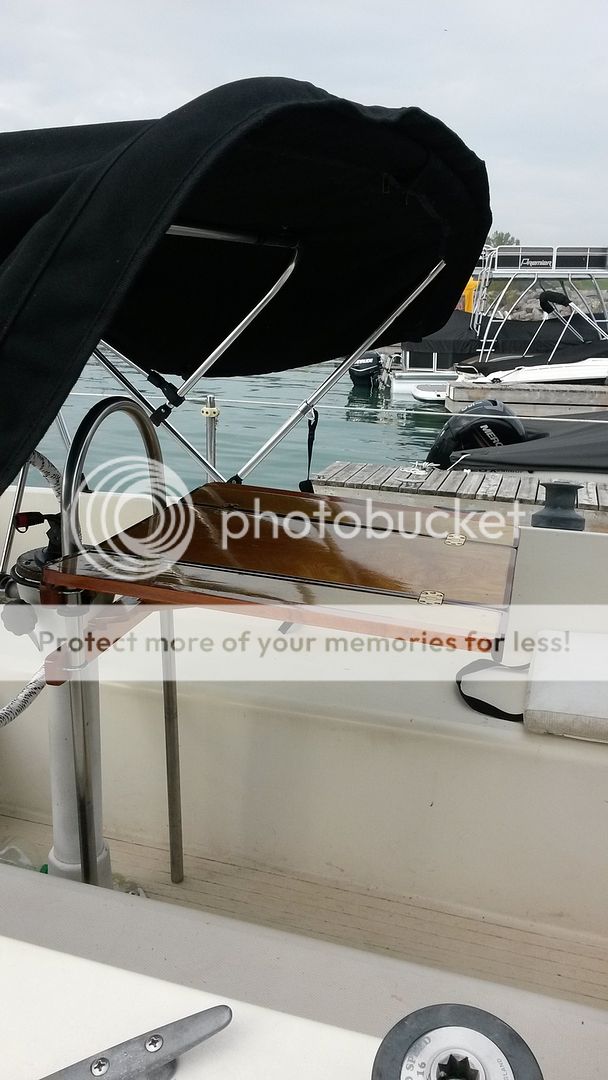


     The keys to a durable finish are preparation and penetration.  Each finish coat has to bond to the previous coat,  which has to be firmly bonded to the surface being coated.  At the risk of being all new-agey metaphorical, think of a varnish job like growing a tree- it needs to be able to plant roots, and then grow, one layer at a time. 
     So, continuing the metaphor, you need to prepare the soil for planting.   

Step 1.  The first step is to ensure that the surface is entirely naked- free of paint, old varnish, old caulk, et cetera.  Any place where an old finish remains is a place where a new finish can't take root. 
I like using a cabinet scraper to get the worst off, then sanding with 60/80/120/150 grit until the wood is bare.  If you use a chemical stripper, makes sure you wash the surface thoroughly to remove any trace of stripper prior to sanding. 

Step 2.  Sand the bare wood with 180 grit sandpaper  to prepare the surface for the first coat. 

Step 3.  Clean the surface to be varnished.  I use methyl hydrate (alcohol) on a lint free rag, or paper towel.  It picks up dust well and evaporates quickly, leaving nothing behind to contaminate the finish coats. 

Step 4.  Prepare your finish-Open your can of varnish, and mix the varnish by STIRRING, not shaking. Thin your varnish of choice , with the appropriate thinner, to a ration of about 1:10- 1 part varnish to 10 parts thinner.  Yeah, it's 90% thinner, for a reason- you want the first coat to penetrate DEEP into the wood.  The advantage of a thin coat is that it cures relatively quickly, allowing you to apply multiple coats per day. 
      Obviously, you're not working straight from the can.  I like to decant the varnish into a plastic sour cream or yogurt container with a lid before thinning. Apply with a foam brush, or a low pile lint-free roller on larger surfaces.  I like to let the brush "rest" in the cup for a couple of minutes while I wipe down the wood to be finished.   When applying, work in one direction, with the grain, from end to end, always working from the wet surface to dry. Don't flap your brush back and forth- work in one direction only. Don't overload the brush or roller!  This  is a thin coat- a little goes a long way, and any more than a little will run and drip and waste material.  Don't panic about bubbles.  They will flow out within seconds. 
  When finished, put the lid on your varnish cup, and throw your roller or brush away.  Clean your roller tray if you used one.   
    When Coat #1  is dry the touch, move on to the next step. 

 Step 5. Apply coat #2- Thin your varnish of choice, with the appropriate thinner, to a ratio of about 1:5 – 20% varnish, 80% thinner.  Chances are, you have some left in your yogurt container- just add some more varnish and stir.  All of the ratios are approximate, so being a little over or under is not the end of the world on these early penetration coats.  Apply the same way you did coat #1. 

Step 6. Sand.  Using a sanding block, sanding board, or power sander, sand the surface with 220 grit.  Time-saving Pro Tip:  Load your sander of choice with multiple sheets of paper.  As a sheet loses its grit, tear it off and keep going.  

Step 7.  Clean the surface with alcohol.  

Step 8.  Apply Coat #3 thinned about 1:1 – 50% varnish, 50% thinner.  Apply as previous coats. 

Step 9.  When Coat #3  is dry to the touch, apply Coat #4, thinned 1:1.  Apply as previous coats. 

Step 10.  Now you are starting to see some  shine, and probably some runs and drips as well. Sand with 220 grit, to knock off the gloss and give some tooth to the surface.  Sand out any runs and drips, but be careful not to get carried away and sand off an entire coat! 

Step 11.  Clean the surface with alcohol. 

Step 12.  Apply Coat # 5, thinned about 3:1 -  75% varnish, 25% thinner.  Apply as previous coats. 

Step 13.  When Coat #5 is dry to the touch, apply Coat #6, thinned 3:1.  Apply as previous coats. 

Step 14.  You will start seeing some real depth to the finish, and some impressive shine.  You will admire your reflection in the surface, and take pictures to show your friends on facebook. Bystanders will compliment your work.  You will think "it's good enough.'  You will want to be done.   
You are not.   
Sand, just like in Steps 6 and 10.  
  
Step 15.  Clean the surface, one last time, with alcohol. 

Step 16:  Apply Coat #7, thinned 9:1- Yep, you guessed it, 90% varnish, 10% thinner.  Apply sparingly and slowly- a little goes a long way. 

Step 17: When Coat #7 is dry to the touch,  LIGHTLY scuff the surface with 220 grit sandpaper or higher.  If I am feeling finicky, and working with a surface where a mirror gloss finish is desired, like a table top, I will wet sand with 400 grit paper.  For most exterior marine wood, like coamings, rubrails, toerailsetc,   220 grit is more than sufficient.  Any minor swirls and scuffs will go unnoticed as new scuffs and swirls are added during regular use. 

Step 18:  One last time, clean the surface with alcohol. 

Step 19:  At last!  Finally,  apply Coat #8, thinned 95:5- 95% varnish, 5% thinner..... 

Step 20:  ….Unless you sail where the butter melts in January.  Then, when Coat #8 is dry to the touch, add a Tropical Coat #9,  thinned as Coat #8. 


     "Great mother of Neptune!"  Skeptical Reader thinks to him/herself, (but not out loud, because you are a Polite, as well as Skeptical, Reader), "That's a crap-ton of work! All that sanding and thinning and brushing and sanding and cleaning and thinning and, I thought you said this was going to take less time!" 

     Once you have the surface prepped, all the old crud off and ready for refinishing, you can apply two coats of varnish per day- one in the late morning after the dew is off, and one in the late afternoon.  So, figure four days to apply 8 coats. 

     But, once you have put in those four days, applied those 8 coats, sanded and prepped and brushed and sanded and cleaned , repeat, repeat , repeat... the hard work is done for YEARS. 

   Every three years or so, scuff the surface and apply a maintenance coat, thinned 5%, just like Coat #8.   

     If any nicks, scratches, dings, dents, gouges or chunks  occur (and we all know they will)   scuff and recoat ASAP.  The key to a lasting finish is to make sure the wood is not exposed for any length of time. 

Yes, Skeptical Reader?  How is this less time –consuming than applying That Other Stuff, you ask? 

   Let's do the math:  if you only plan to keep your boat for a single year, there is no time savings- applying a knee-weakeningly gorgeous varnish finish is more labour intensive than smearing the recommended three  coats of TOS all over your teak and mahogany and oak.  
    But, applying those three coats will require 3 days, minimum- you can't "hot-coat" TOS- it needs to dry for 24 hours between coats. 
     So initial application is 3 days of time, plus initial prep, PLUS, you need to sand between coats.  
In year two, the surface will have to be sanded and another coat of TOS will need to be applied.   
In year three, sand and apply another new coat. 
In year four, sand and apply another new coat . 
In year five, sand and apply another new coat. 
In year six, sand and apply another  new coat. 

     So over 6 years of ownership, at least 8 coats of Cetol have been applied, and the finish  sanded after each coat- in other words, 8 times. 

     Compare to varnish:  
    Sanding 5 times during the initial application schedule, and NOTHING until a scuff sanding and maintenance coat every 3 years. Over 6 years, you have only had to sand the brightwork and apply a maintenance coat twice.  Sanding and cleaning always takes more time than applying finish, so the less sanding and cleaning you have to do, the more time you have to do something else. 


And we all know there is always something else to do. 


Thanks for dropping by-  Please, feel free to "Talk the Dock!"

Friday, 16 December 2016

Welcome to the Jungle


                       "Hey man, thanks!!!!!!"
                         -The Tragically Hip


           So, here it is, August 14th, and the weather is hot and sweaty.
         
           Just like yesterday.

           The forecast is hot and sweaty tomorrow.

           In fact, the forecast is hot and sweaty for at least the next week, with no relief in sight.
       
           No wind.  Might as well take a nap.


         ***************


           *Yawn.*

           *Stretch.*

           Uh-oh.

          Great googley-moogley!!!!!    How the HELL did it get to NOBLOODYVEMBER  DEDAMNCEMBER already?


          This has definitely moved me into the quarter-finals of the World Procrastination Championship  (Playoff schedule to be announced shortly, maybe.)

     *sigh*


         Well, in the words of Inigo Montoya,

       "There is too much.  Let me sum up."

         It's been an interesting few months.

          Might as well begin at the beginning, way back in August:


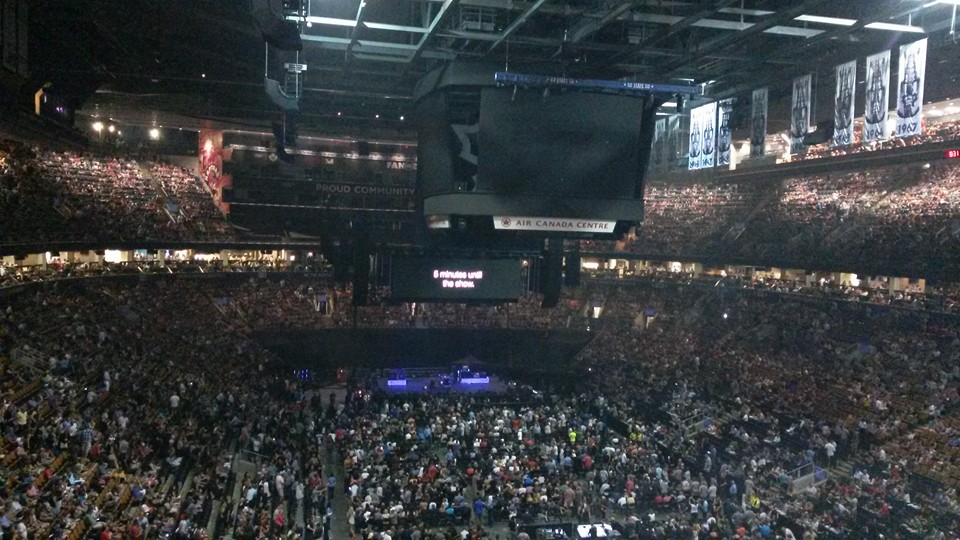
          Completely off the Dock, but worth mentioning, because it was such a unique experience- SWMBO and I got to see The Tragically Hip play the Air Canada Centre on August 10.

          I have never felt so damn Canadian.


   See, here's the deal:  The Tragically Hip is like Canada's house band.  They aren't the soundtrack of our 20something to 40something lives, The Hip is more like the score:  always there, always in the background, sometimes swelling to take the spotlight, and, sometimes, taken for granted,
 because they were always THERE.

There was always another tour next year, another album, another chance...

.... until there wasn't.

  The band's quirky writer and frontman, Gord Downie, announced in June that, well...

... he was dying.

  He had a brain tumour, and while the prognosis was clear, that he was a dead man walking, there was some time.

  The band decided, as a band, (because make no mistake, even though Gord was the face and voice,   these five guys were a unit, playing together since high school,  nigh on 35 years,) to launch one last tour.

   What followed was a uniquely Canadian event- a concert tour that was equal parts concert, party, wake, and tribute to Gord.
(Yeah,  I think every Canadian calls him Gord- it's that kind of band, he's that kind of person, and we're that kind of people.)

Shows sold out across the country, and by the time the band rolled into Toronto, it was obvious this was no gentle victory lap of greatest hits.
 

   I am lucky enough to work in the radio industry,
   Further lucky enough to work for a small network run by a guy who loves what he does, and likes his crew-  he held a contest for employees, giving away a pair of tickets,
   and I was lucky enough to WIN!

  Thanks, Jon!


   From the opening chord of "Courage (for Hugh Mclennan)", that dead man walking worked that stage for almost three solid hours that night in Toronto.  Gord was occasionally teary eyed, and some say he looked frail,

   but he flat ran that room.

   And if you didn't tear up at least once, you weren't there.

   How big a deal was this concert tour by the best band you've never heard of?

This is where things really get Canadian.

   The Canadian Broadcasting Corporation, often maligned, often unappreciated, often viewed as an anachronistic irrelevancy in the 21st century, lived up to it's name, reclaimed it's role as CANADA'S media, dropped the bomb, and then dropped the mic:

   The CBC stepped up and  decided to bring the party to the people, by broadcasting the final show live, on all of it's platforms. Television, radio, online, on demand....

.... for free.

   So, we saw The Hip again, on August 20th, at the Marina, broadcast on a sheet hung in one of the pavilions at the foot of  Dock One, along with a hundred or so others...


 ...and over 11 million other Canadians .

   And if you didn't tear up at least once, you weren't there.


     Paul, Johnny, Gord, Rob and Gord:  Thanks for everything.


                                                        -video courtesy of VEVO and YouTube


     As noted earlier, the summer of 2016 was hot.

     The winter of 2015/16 was not cold, nor long.

     That made conditions perfect for a bumper crop of Dockgrass, aka Eurasian Water-Milfoil.

      This shit is evil.  It grows rapidly, it grows long, and it grows tenacious.  During the month of August it quite literally clogged the fairways of the marina. It wraps props, snags centerboards and generally acts as a hazard to navigation.


Typically, after backing out of our slip and leaving the marina 2 knots slower than usual,  a quick blast of reverse would clear a ball of weeds from the prop that looks like this:


    We are responsible for keeping our slips clear of weeds, so every couple of days, our Dock looked like this:


   That's two days worth of growth, in two slips.

   Down the Dock it's even thicker, as wind and wave action tends to push the floating mass into the corner, where the Dock meets shore.


   The marina has a dedicated harvester, but it's one machine fighting a losing battle- it's payload is relatively light, so the bulk of running time is spent transiting to shore to offload into a 40 foot bin, then transiting back to the fairway in play, and then back to unload...

   There's no easy solution, so we bear it and keep sailing.


   I have a suspicion that Dockweed hastened a soon-to-be discovered problem aboard Karma.

   SWMBO and I took an extended Labour Day weekend  and on Friday decided to make an afternoon run to Pottahawk and back.  We motorsailed out, making good time, clicking along at a happy 5-6 knots in 8-10 knots of wind.  Motorsailing, because I'd been having some concerns about our engine-  Karma had felt down on power in recent days, so I thought a good 2-3 hour  run wouldn't hurt.


    We scooted past Port Ryerse, then past the site of Bushstock, a new 2 day music event in the 'folk....


Then sailed past Fisher's Glen...


...making good time, we continued past Normandale....


 ...two hours out, we spy Turkey Point to starboard...


... as the beach trailed behind our transom we turned to port to cross the gut that separates outer Long Point Bay from the Inner Bay, and headed to Pottahawk...


  It was a damn near enough perfect day for sailing- decent wind,  and fairly typical bay chop, but we had the Bay pretty much to ourselves- in 20 miles-ish of travel, we saw just a handful of other boats.

 
We reached Pottahawk, turned to port again to head for home, and with the wind on our nose, it was all engine now, so we furled sails and throttled up to 2/3 throttle, call it 2200 rpm, which gave us...

... a blistering 3 knots.

Huh- maybe the headwind is stronger than it feels.

So nudging the throttle to 3/4, about 2700 rpm, we found ourselves pounding along at
.... a blistering 3 knots.

Which shortly decreased to 2.8, then 2.7, then 2.5 knots

"That's not right," methinks.

Throttling back, SWMBO and I chugged along at a now steady 2.5 knots, and troubleshot:

 Maybe a ball of weeds around the prop?

SWMBO throttled down, shifted into reverse, boat speed jumped to 4.5 knots,  no telltale mulched weeds arose from under the boat.

Back into forward, back to 2.5 knots.

Huh.

I go below, retrieve the service manual for our mighty Yanmar YSM-8 powerplant and start reading.

Shit.

The transmission on our iron genny has two "friction discs", essentially clutch discs  that do the job of taking the 8 hp created by the engine and transferring it to the prop shaft to drive the boat.  One clutch disc handles forward go, one clutch disc is tasked to handle reverse.

Guess which one is used more?

Guess which one signals it's decided to retire by no longer transferring all of the engine's mighty 8 hp into usable propulsion?

Yeah- obviously the reverse disc was still good to go, but the forward disc would go no mo'.


Yay, problem diagnosed!  But, there wasn't a damn thing we could do, except motor along at 2.5...

...2.4...

...2.3 knots.
...and dropping.

Oh well, lots of time to surf for replacement parts on my phone, which led me to discover that, like many parts for boats built when John Lennon was still alive, the friction discs in question were rumoured to be No Longer Available.

Great.

Five and a half hours of feathering and nursing the throttle after making the port turn at Pottahawk for home, we limped into the marina, in the dark, inching into our slip at 1.5 knots.

I stopped into  Bridge Yachts on the Tuesday after Labour Day, and requested they find the part, if possible.  Three days later I got a call- they found two discs.

The last two YSM-8 friction discs on the planet allegedly.
In Japan.
They would be here in three weeks.
I ordered them both.

Meanwhile Karma lay forlorn in her slip.

Where Karma largely remained, until Phil and Corinne and Compass Rose towed our burdened beast up the river to the Bridge Yachts yard  at the end of October.

The last two Yanmar YSM-8 friction discs on the planet finally arrived....  in the third week of November.

I'll deal with it in the spring.

The great thing about owning a fleet is that, while the big boat may be down and out, SWMBO's ride, Ereni, was more than happy to stretch her legs.


Ereni is no faster than Karma-  in fact, if you belief PHRF, that sleek little race-pedigreed one design daysailer is owed a little time by Karma-

but she FEELS faster.

It's like stepping out of a cabover Kenworth truck and stepping into an E-type:  The same speed feels entirely different.

Sailing Karma  is fun.

Sailing Ereni is FUN.

  Brutal honesty time- too often, sailing Ereni  is a bit of a shitshow.   The mainsail reefing line too tight, or too loose...


....the topping lift hung up on the backstay....

  Her sails are blown out, her bottom is fuzzy, she needs new standing rigging, new running rigging, new mainsail tackle, her fuel tank relocated, her brightwork brightened, the list of what she needs goes on and on...


  .....but when we get it right, it is pure magic:


    So, that brings us (mostly) up to current- the boats are on the hard, largely put to bed, all gear is now occupying our dining room and den, waiting to be stowed away, and the winter punchlist has begun. Hopefully, I can bring you up to speed on that little ball of mission-creep before the boats splash for the 2017 season.

In the meantime, if I don't talk at you in the meantime...


   Merry, Christmas, Happy Holidays, and Happy New Year, to all y'all.


    Thanks for checkingin, and as always, please, "Talk the Dock!"


Sunday, 31 July 2016

Spring has Sprung... Right Into Summer pt. 2


      "But where we are going, Oh it hasn't fully, fully been told..."
                                               -Ruby Velle and the Soulphonics


       So, where were we?
Right:  Boat is launched, boat is sinking, boat stops sinking, yadda yadda, Karma glides into her slip with no further drama.  


  With one boat launched successfully, it was on to the rest of the fleet.   With a little help from the crew of  Boats....

...we got our commuter dinghy, Chameleon, to the marina and into the water.


Then, we tackled Ereni, giving SWMBO's Bluenose  a quick and dirty makeover... and a black nose in the process, to cover some of that quick and dirty.  


  Ereni  is due for some serious  hull refitting this winter-  the brightwork needs to be brightened, the hull needs to have some blisters ground/filled/faired, and then we'll refinish the deck and topsides.  But, we think we'll keep the nose treatment, and add some nose art- SWMBO and I agree we both kinda dig the vintage "rat rod' vibe.


Over the two full years we've lived with, and aboard, Karma, we've developed a pretty good idea of our wants and needs, and have fulfilled many of them along the way...

... and created new ones.

  Our reefer install has been a well-received luxury, with an unintended consequence- power insecurity.

   We have 3 40w solar panels that live on top of our bimini, feeding a single Group 24 house battery and a Group 24 starting battery, also charged by the 35 amp alternator on the inboard diesel. Last season, this system proved sufficient....

... barely. 
     If the solar panels underperformed for more than a day, some motorsailing was required to top up the batteries.  We were careful about energy usage, charging electronics only during the middle of the day, being judicious about illumination, vhf and instrument use, etc. and never really had a power crisis...

    But still....

    This season, I made the decision to add more power and more power storage. Here's the plan:  add another 100w of solar power, in the form of a semi-flexible 100 w panel installed on the dodger, then combine the 2 Group 24 batteries already onboard into a two battery house bank, and add a third Group 24 battery for starting, locating it just aft of the transmission in the engine bay. Next year, we will replace the group 24 house bank with a pair of 230 amp hour 6 volt GC-1 golf cart batteries, if we find that the 160 amp hour capacity of the house bank is not enough We decided to isolate the starting battery from the charging circuit- we opted to install a Xantrex Digital Echo Charge. 


 To quote the manual:
 "The Digital echo-charge automatically switches ON and OFF, charging a starter or auxiliary battery without affecting the main house battery bank. The maximum charge current is 15 amps when the starting battery is 1/2 volt to 1 volt DC less than the house battery...  When the input voltage is 13.0/25.5 volts DC or higher, echo-charge automatically switches ON. The LED glows a steady green. When the input voltage is lower than 13.0/25.5 volts, the echo-charge automatically switches OFF, and the LED blinks green. The output voltage of echocharge is limited to 14.4/28.8 volts. When it reaches 14.4/28.8 volts, the charge current will decrease, maintaining a float condition. "

  So, I bought a bunch of obscenely priced cable, less obscenely priced wire, a battery and assorted electrical parts and pieces and tools and stuff and dug in, on the hottest day of the year....


  ... and everything largely went together better than I expected....

.... once I pretty much gave up on the original plan.

I cut and stripped and crimped new cable to wire the existing batteries in parallel...

 ...and that is pretty much where the original plan ended.


A "a semi-flexible 100w panel installed on the dodger" became a semi-flexible 100w panel mounted on the foredeck. temporarily laying the panel on top of the dodger and measuring output demonstrated that there was just too much shading for the panel to generate anywhere near it's potential output. Because of our boat's design, and our usage, the foredeck gets little traffic, so I decided to see if the "you can even walk on it' claims about semi-flexible panels were true. 
   The install was pretty straightforward, once I wrapped my head around drilling 3/4" holes in the deck.  An hours worth of work saw two of the aforementioned holes drilled, some wires run, and the panel fastened to the deck with, and all fittings sealed with, 3M 4200.  


The new panel got a new charge controller, to complement the existing bimini bank charge controllers, then the controller output for both the bimini solar bank and the foredeck solar bank were driven to a distribution block and thence to batteries... 
   ...Which were not happy at all.
    Note to self:  always check polarity before connecting 100 w panel to new charge controller.
    Then check it again.
    Then check it again.

    I didn't, and wired the panel to the charge controller backward, and didn't realize my error for 48 hours.    
   I bought a new charge controller, and now the batteries happily charged away...  but wouldn't hold a charge.  Well, 5 year old lead acid batteries are due for replacement anyway, so "Next year, we will replace the group 24 house bank with a pair of 230 amp hour 6 volt GC-1 golf cart batteries" became "TODAY we will replace the group 24 house bank with a pair of 230 amp hour 6 volt GC-1 golf cart batteries."

   (Note to those of you playing along at home:  Golf cart batteries are about the same width and length as Group 24 batteries...but about twice the weight.  Getting them up onto the boat, then down into the boat, then down further into the battery bay, was an exercise that, in retrospect, would be less danger-filled if one is wearing steel-toed boots, not flip-flops.)

So, new batteries go in, cabling is connected,  and power flows!  Meanwhile, it becomes apparent that "add a third Group 24 battery for starting, locating it just aft of the transmission in the engine bay." is a non-starter.  So, the new batery gets located slightly farther aft, under the aft cabin berth.  The Xantrex Echo Charge install was a breeze- the instructions were clear, the manual was well-written, and all of the supplied bits and bobs were of good quality. 

  Was it worth it?
   Yep. 

   We now generate more power than we can use  and store most days, and have had no problem keeping ahead of our loads even during our very hot July, when our refrigerator was running much more often than it's typical 30% duty cycle.

    As we have realized the need for more power, we also have been grappling with our need for more space. the S2 8.0C is a cleverly designed boat, pulling 26 feet of accomodations out of a 26 foot LOA hull...  but that means that on-deck and cockpit storage is  non-existent. Coaming pockets would be a big help for line management- sheets would no longer be all over the cockpit benches and underass, an uncomfortable proposition during a crash tack.  I did some measuring, found a pair of fire extinguisher pockets in the clearance rack at a local chandlery, and a little mahogany and varnish and cutting larger holes in our boat and screws later...


Our cockpit is slightly more organized.


Also seen in the above picture, behind the compact sportsdawg, you can kinda spy that scrap mahogany was also used to craft risers, to raise the height of the bimini slightly.

Below, little has changed, other than a new trawler lamp,  cushions that are 1" thicker and comfier, and new Low-Buck back cushions and throw pillows have been added:


   We lucked out at our local grocery store (I shit you not- the grocery store)  and found outdoor furniture cushions and pillows in the right colours,  and amazingly, the right size, for half price.


    Life is good, and more comfortable than ever...and the sailing's not too bad either.


Thanks for having a read.  Pass the word-  Please "Talk the Dock!"


Thursday, 30 June 2016

Spring has Sprung... Right Into Summer Pt. 1


        "This heat has got right out of hand..."
                                        -Bananarama


    * I started writing this post on May 30th....how the HELL did it become the end of June????

      Spring has sprung...

      ...  and then  more Summer came along and kicked it's ass.

    Check this- May 13th, we had sun, rain and temps around 15 degrees on the c scale.
                        May 14th, we had 30 knot winds and 6 degree temps.
                        May 15th, we had snow on the Dock.

                       SNOW.

                       Note that I did not opt to do any boatwork on those days.  Nope, not me.  I had a list of things to do but...


                       I opted out.  I called it on account of weather.

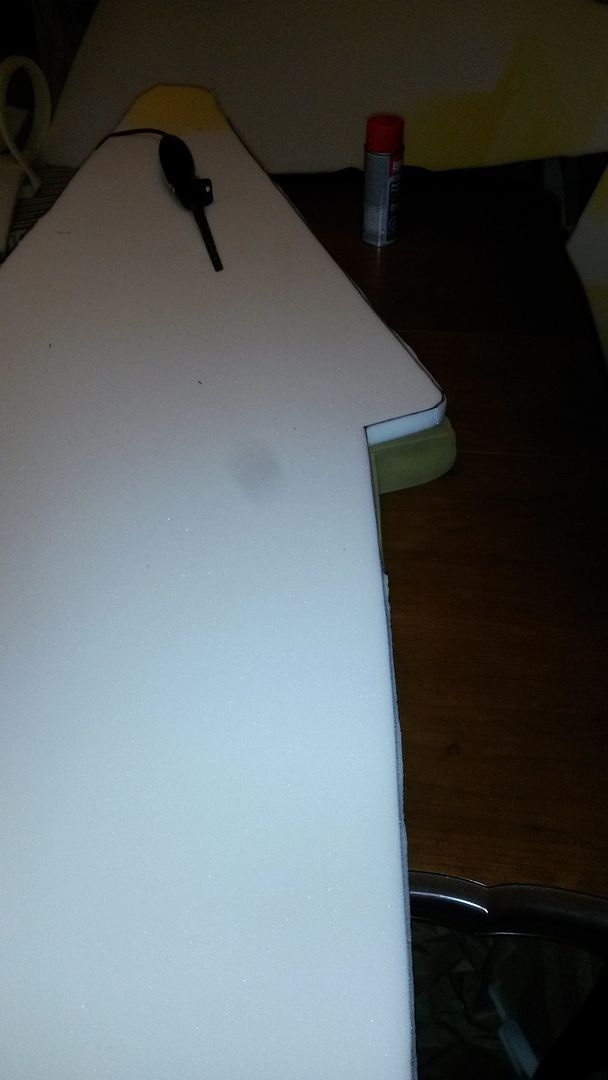
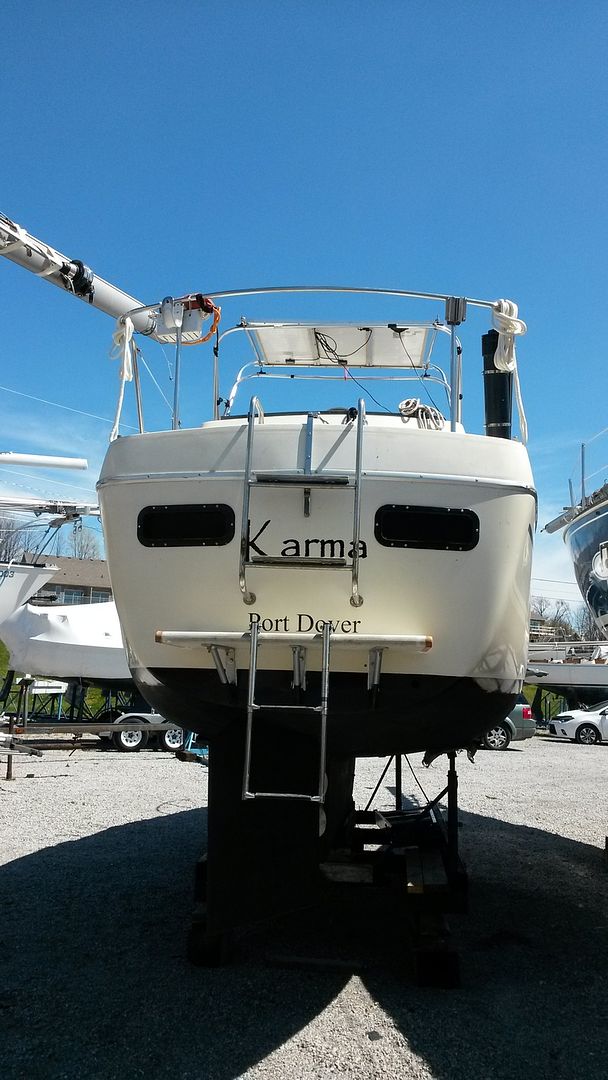
       SWMBO and I got a lot done in the weeks prior to splash, including, new carpet, new foam for the cabin cushions, and a new Low-Buck swim platform...


Karma hit the water on the first Friday of May, one of our earliest launches ever....


...and  she promptly decided to start to sink.

I was toiling away at my day job, making local businesses locally famous, so SWMBO was supervising the launch solo.  As I was on my way to the boatyard, toiling completed, I received a cryptic text message:

"Water"

 Hmmm...
Is SWMBO thirsty?
Is  she telling me that the boat is now in the water?
Or...is she telling me that the water is now in the boat?

Then, I received another cryptic text message:

"Hurry"

So, I hurried.

I got to the yard, and spied SWMBO in Karma's cockpit, pumping away.  Turns out, "water" was , in deed, coming into the boat.... at a worrisome rate. "Hurry" was appropriate, as the sole was awash, and SWMBO was usunre where the water was coming from.  I hurried down the companionway ladder, tore open access panels,  checked the stuffing box (fine) and then the raw water strainer (decidedly unfine, water streaming from the top of the reservoir).

     I closed the seacock so the water stopped hurrying into the boat and  removed the strainer and found that the o-ring seal was no longer sealing.

    It's Friday, it's after 5, nothing is open that is going to have the part that will solve this problem.  As I was pondering the paucity of options, Skipper Andy wanders past, headed to Cyclone, docked at the Bridge yachts yard this season.  I yell, enquiring rather loudly whether he may have any sealant materials aboard.

   Turns out he does-  and it is appropriately named:

  a strip of caulk later, and we're back in business, leak free.

  Thanks, Skipper!!

   It turns out that the water strainer seal has likely been quietly leaking, unseen, for several years-   the strainer is located in a corner of the engine bay and the leak was  not visible.  But, that unseen unknown leak meant that we had to be vigilant to pump our smallish bilge ever 3-4 days.   Since  resealing, we now pump our bilge every 7- 10 days, with little to show for the effort.

  So, boat no longer sinking,  we fire up the trusty Yanmar YSM-8 and set off downriver and around the corner to the marina, and we survey what's new on the Dock.

   Turns out, quite a bit.

    More to come  in Pt. 2.


Thanks for stopping by.  Please "Talk the Dock!" and pass the word.